
There's something you should know about the Five Billion Star Hotel.
If I ever need to jump-start it, there's a pretty good chance it'll be raining.
Probably sideways.
And I'll probably be somewhere inconvenient.
That's just how these things work.
Unlike most vehicles, my 1994 Mitsubishi Delica L300 has its engine tucked beneath the front seats. To access the battery and engine compartment, I have to open the passenger door and raise the seat.
Not a particularly big deal when I'm working on the Delica in the driveway. But imagine having to do all that on the side of a road, in the rain, just to connect a set of jumper cables.
No thanks.
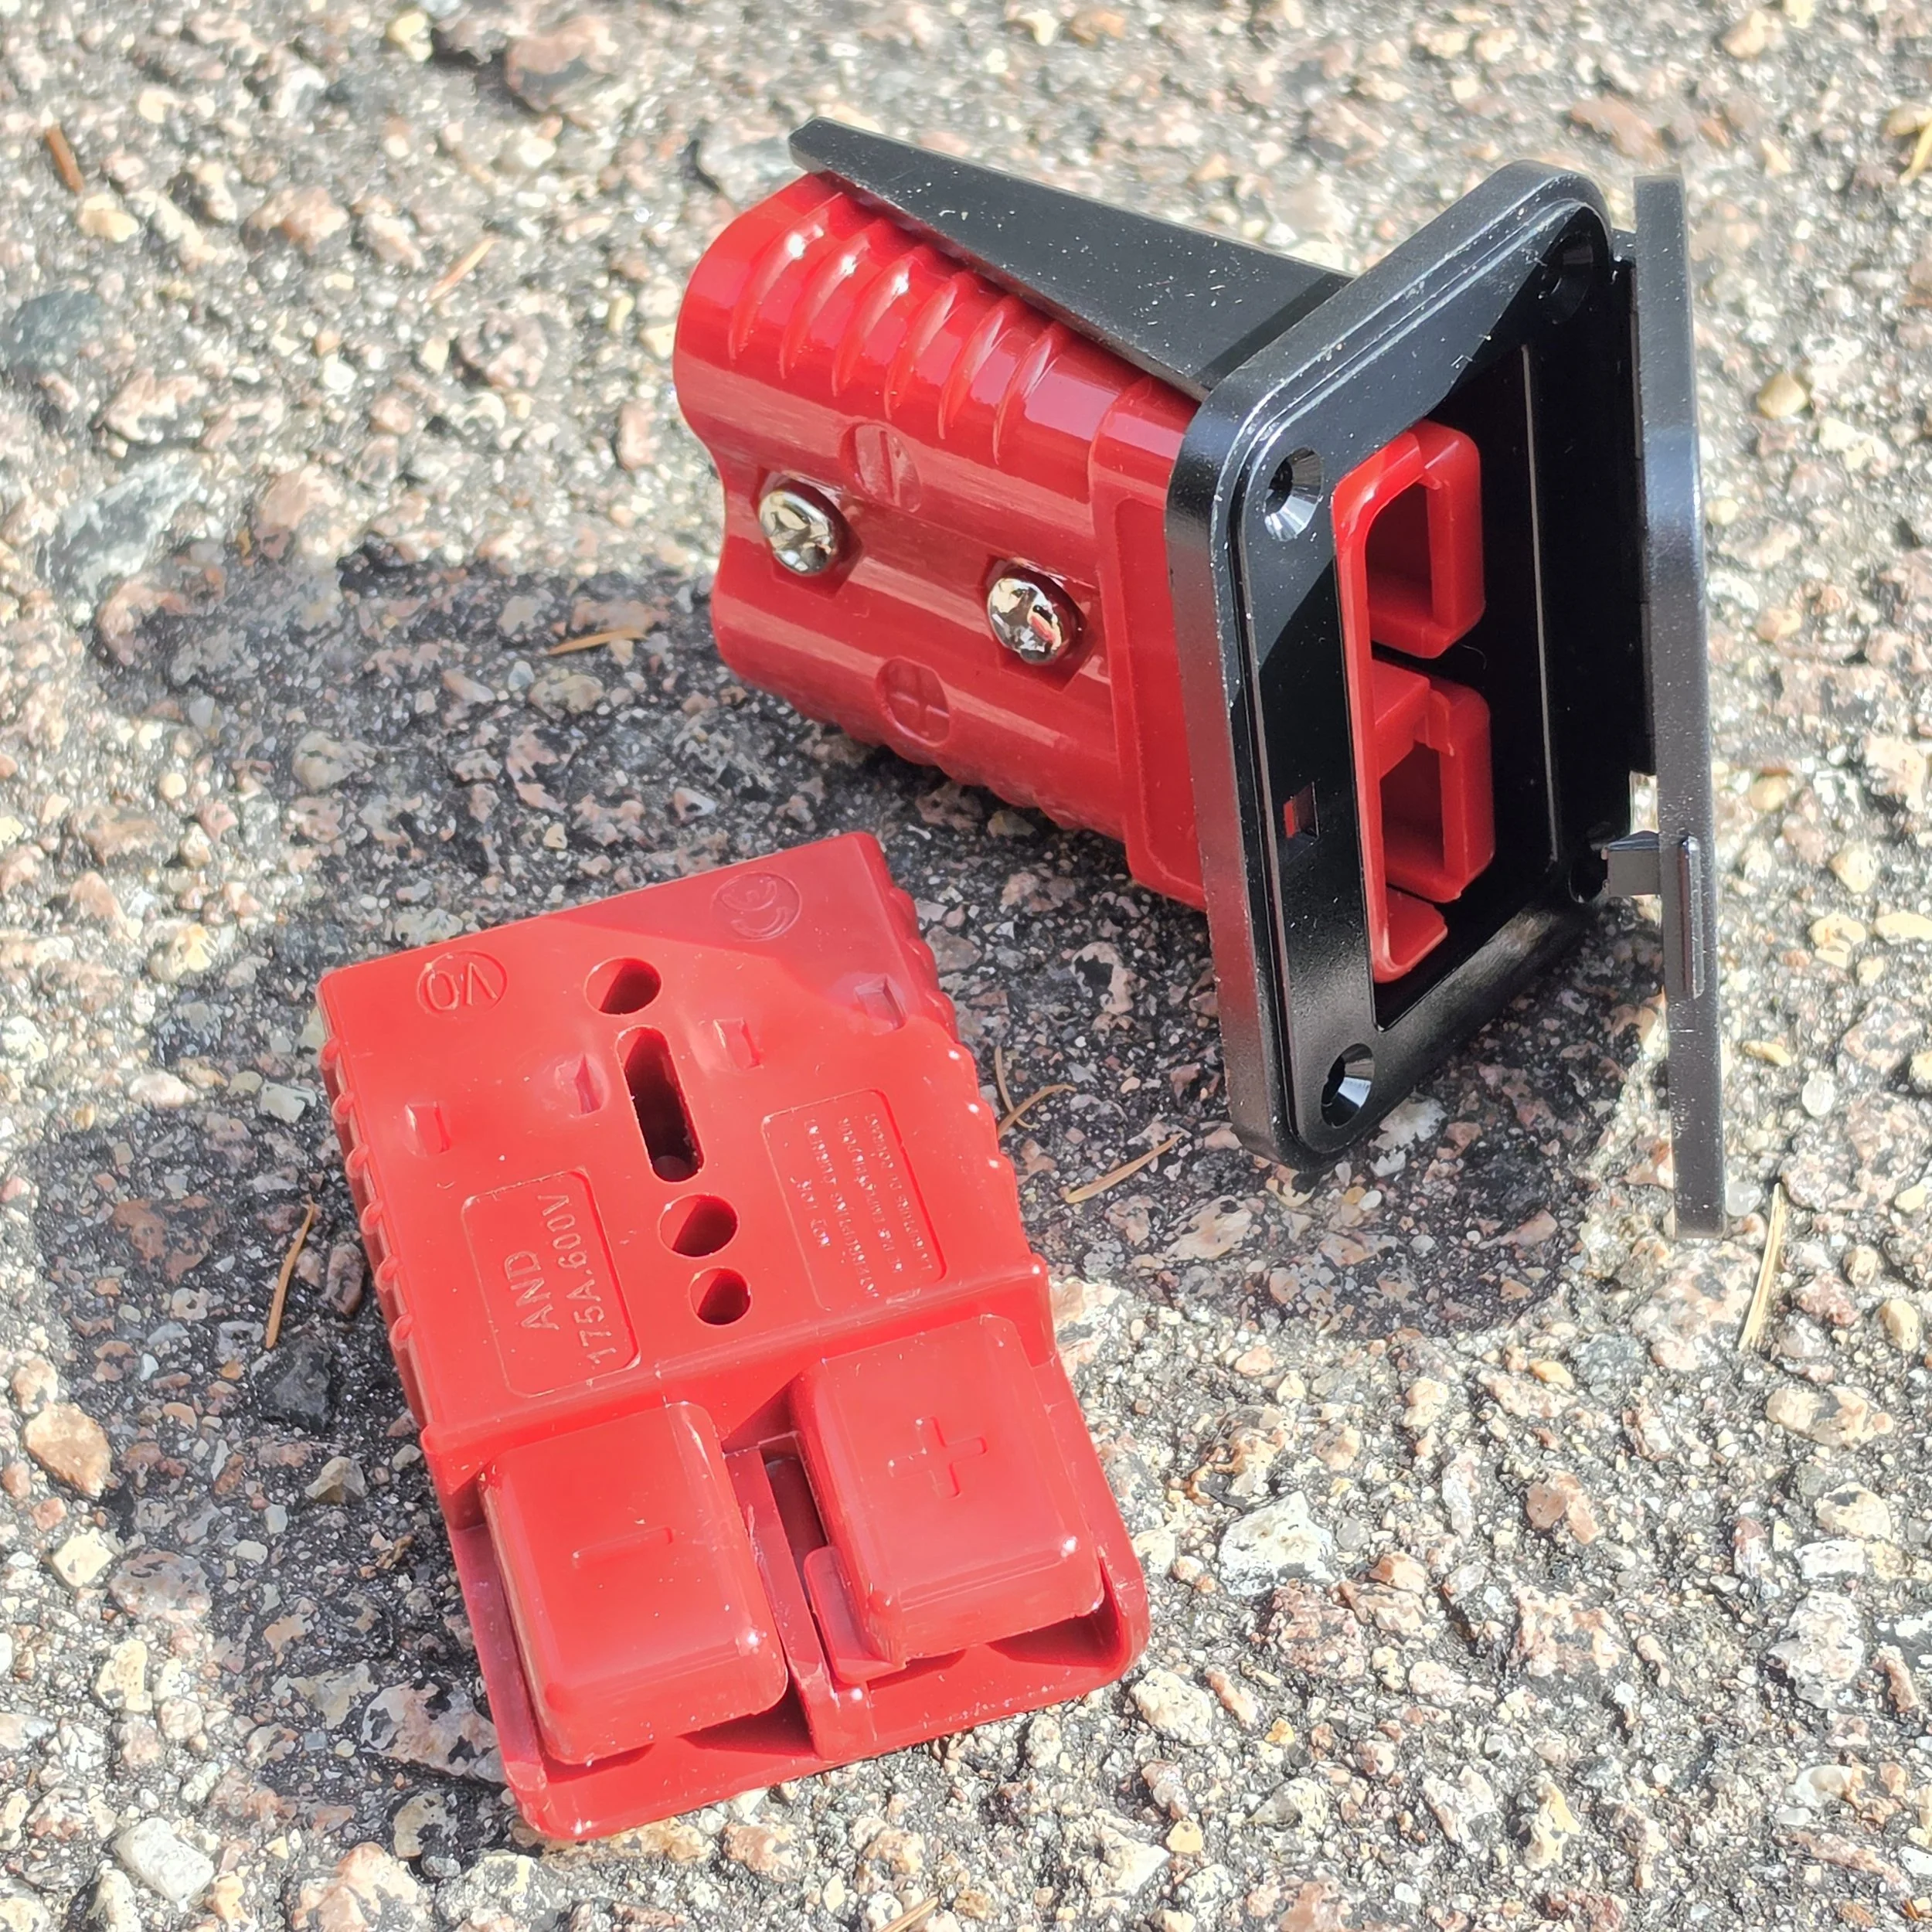
So, I decided to install an external quick-disconnect port that would allow me to connect jumper cables without ever opening the engine compartment.
Better yet, the same port could serve a second purpose: powering my external air compressor.
When I'm exploring rough backroads and rocky trails, I frequently air down my tires for better traction and a more comfortable ride. Eventually, though, I have to return to pavement. That's when the compressor comes out.
One port. Two uses.
Seemed like a worthwhile modification.
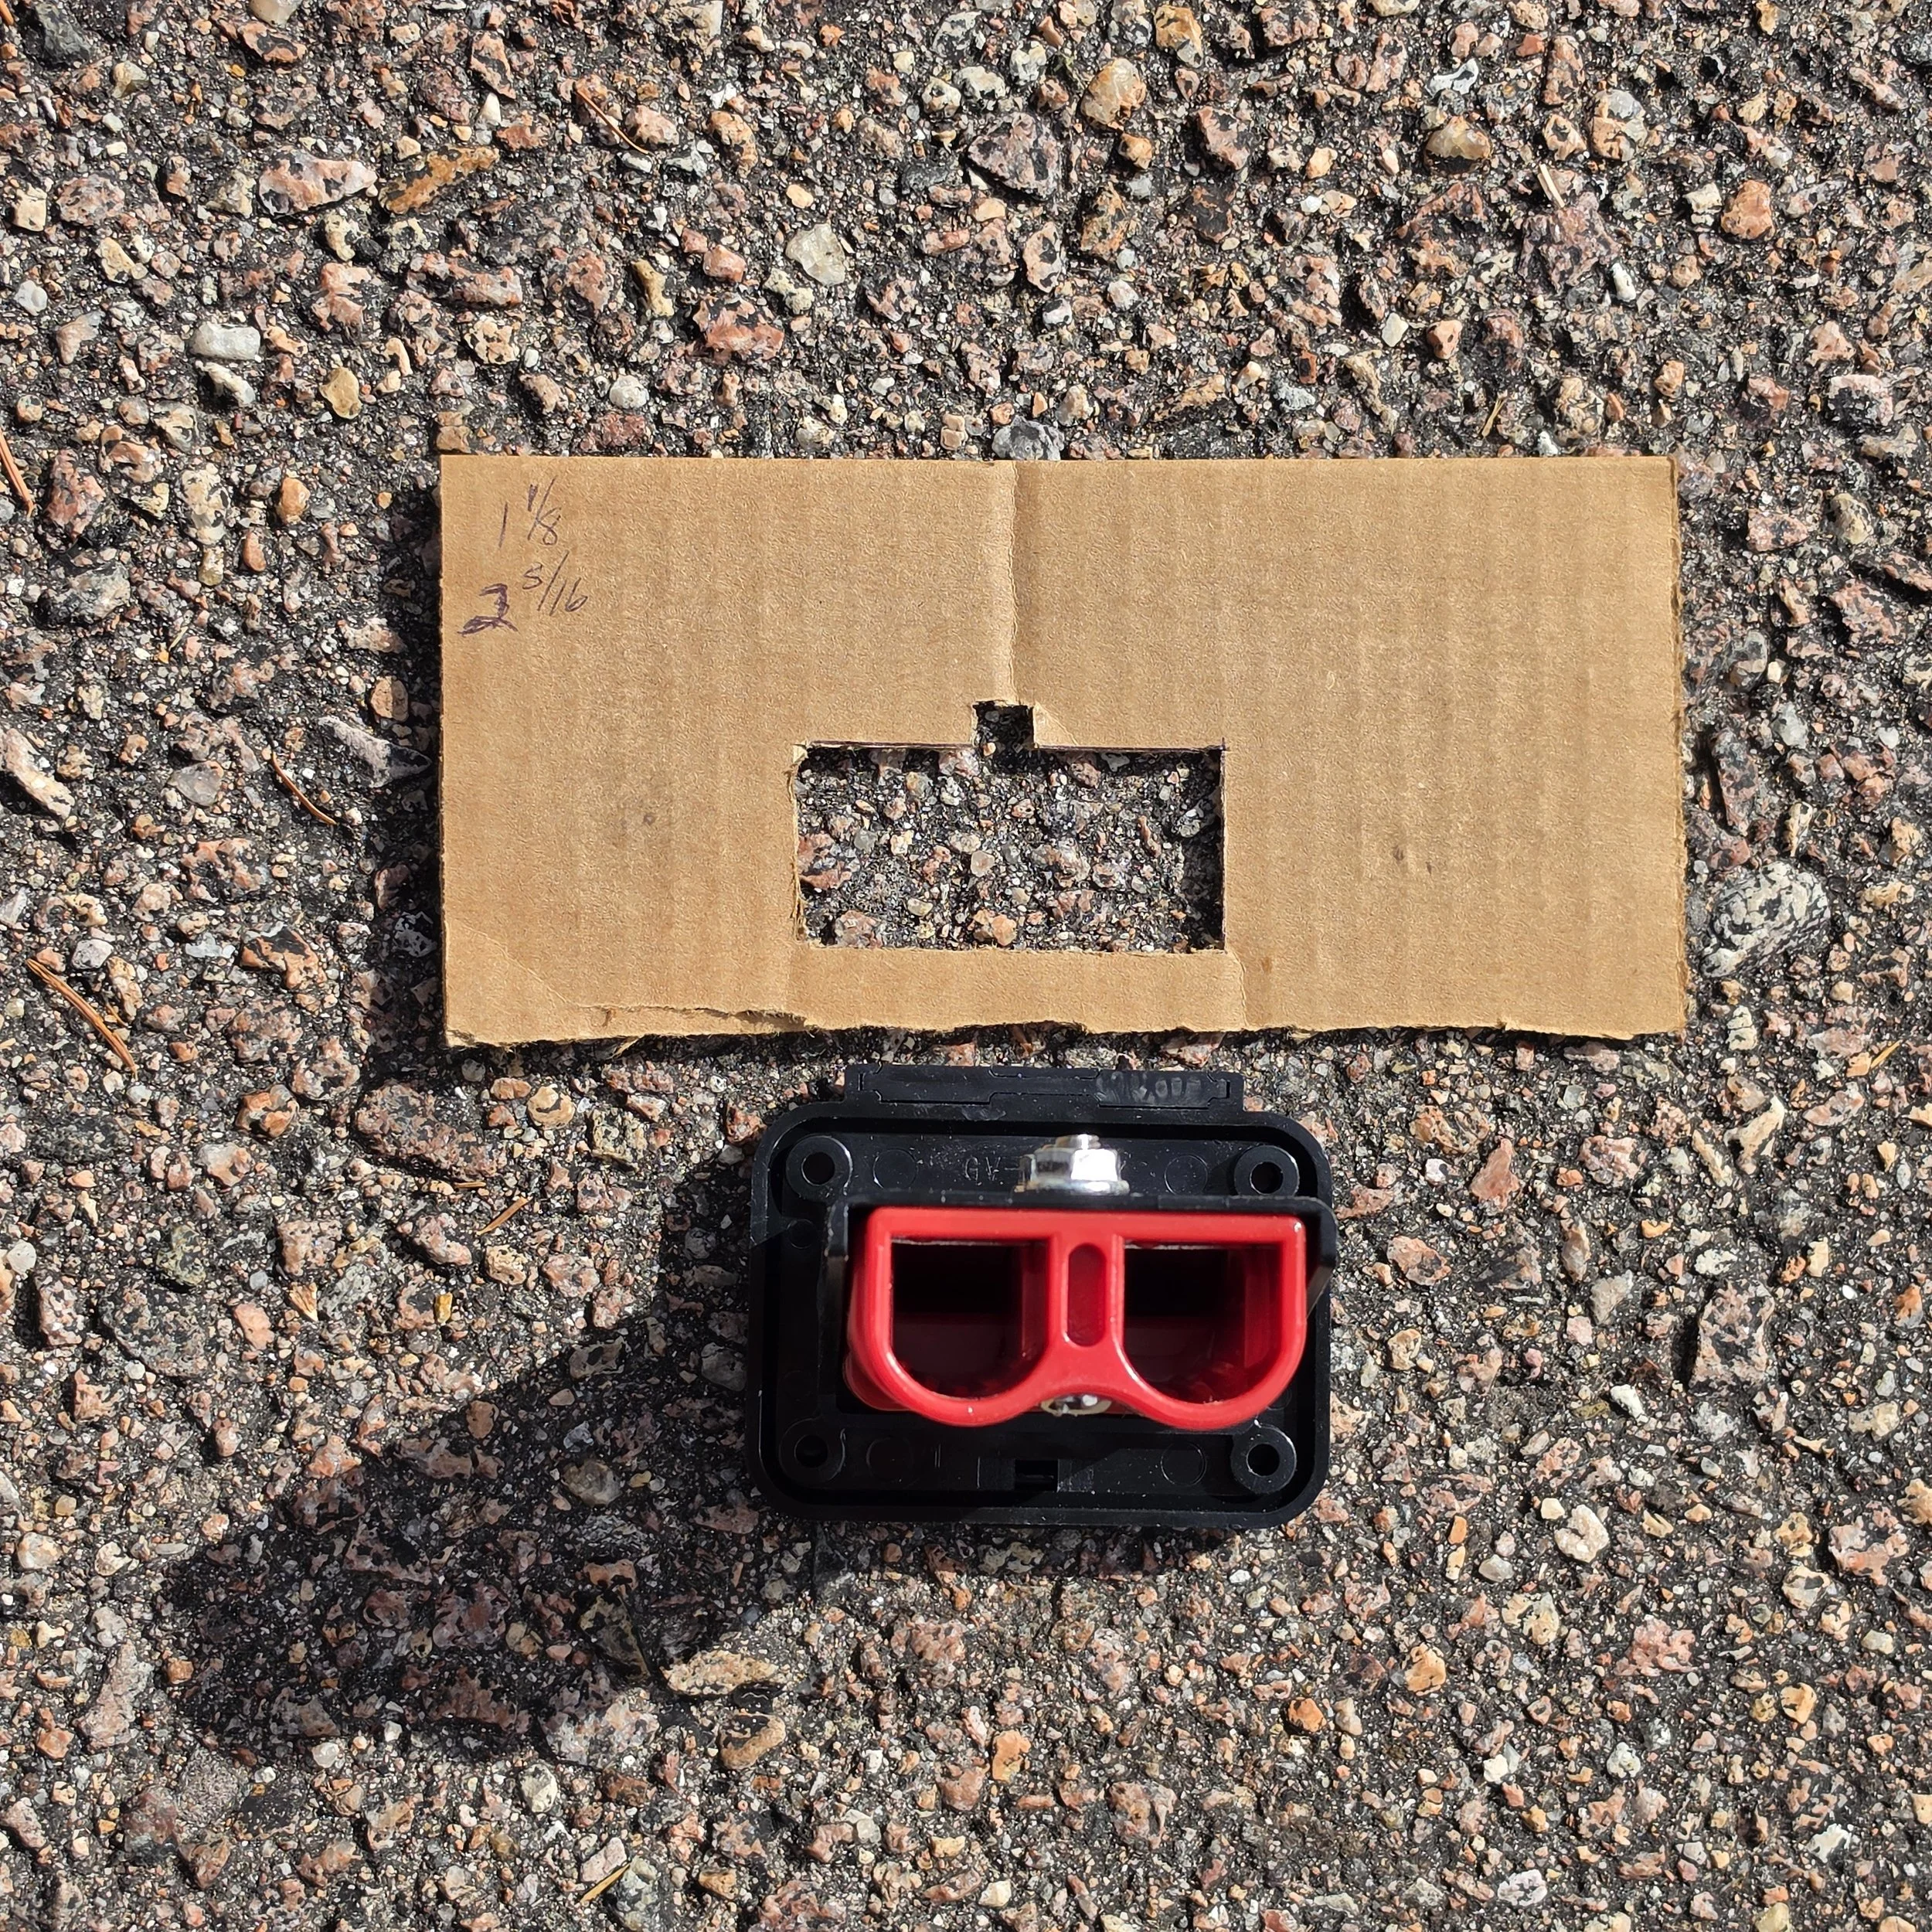
Before cutting into the bumper, I made a cardboard template to transfer the connector's dimensions and mounting location. A little preparation goes a long way. Well, usually.
Finding a Home for the Port
I'd narrowed the installation down to two possible locations before ultimately settling on the front bumper.
I'd recently installed an engine block heater connection on one side of the bumper, so putting the jump-start port on the opposite side seemed like a natural choice.
A little symmetry.
A little convenience.
And both connections would be accessible from outside the vehicle.
There was, however, one important consideration.
The port itself wasn't the only thing that needed to fit. I also had to account for the large connector and cables that would eventually plug into it.
I couldn't simply place the port wherever it looked best. I needed enough room to insert and remove the connector without fighting the bumper or surrounding bodywork.
That pushed my preferred location a little farther forward than I'd originally planned.
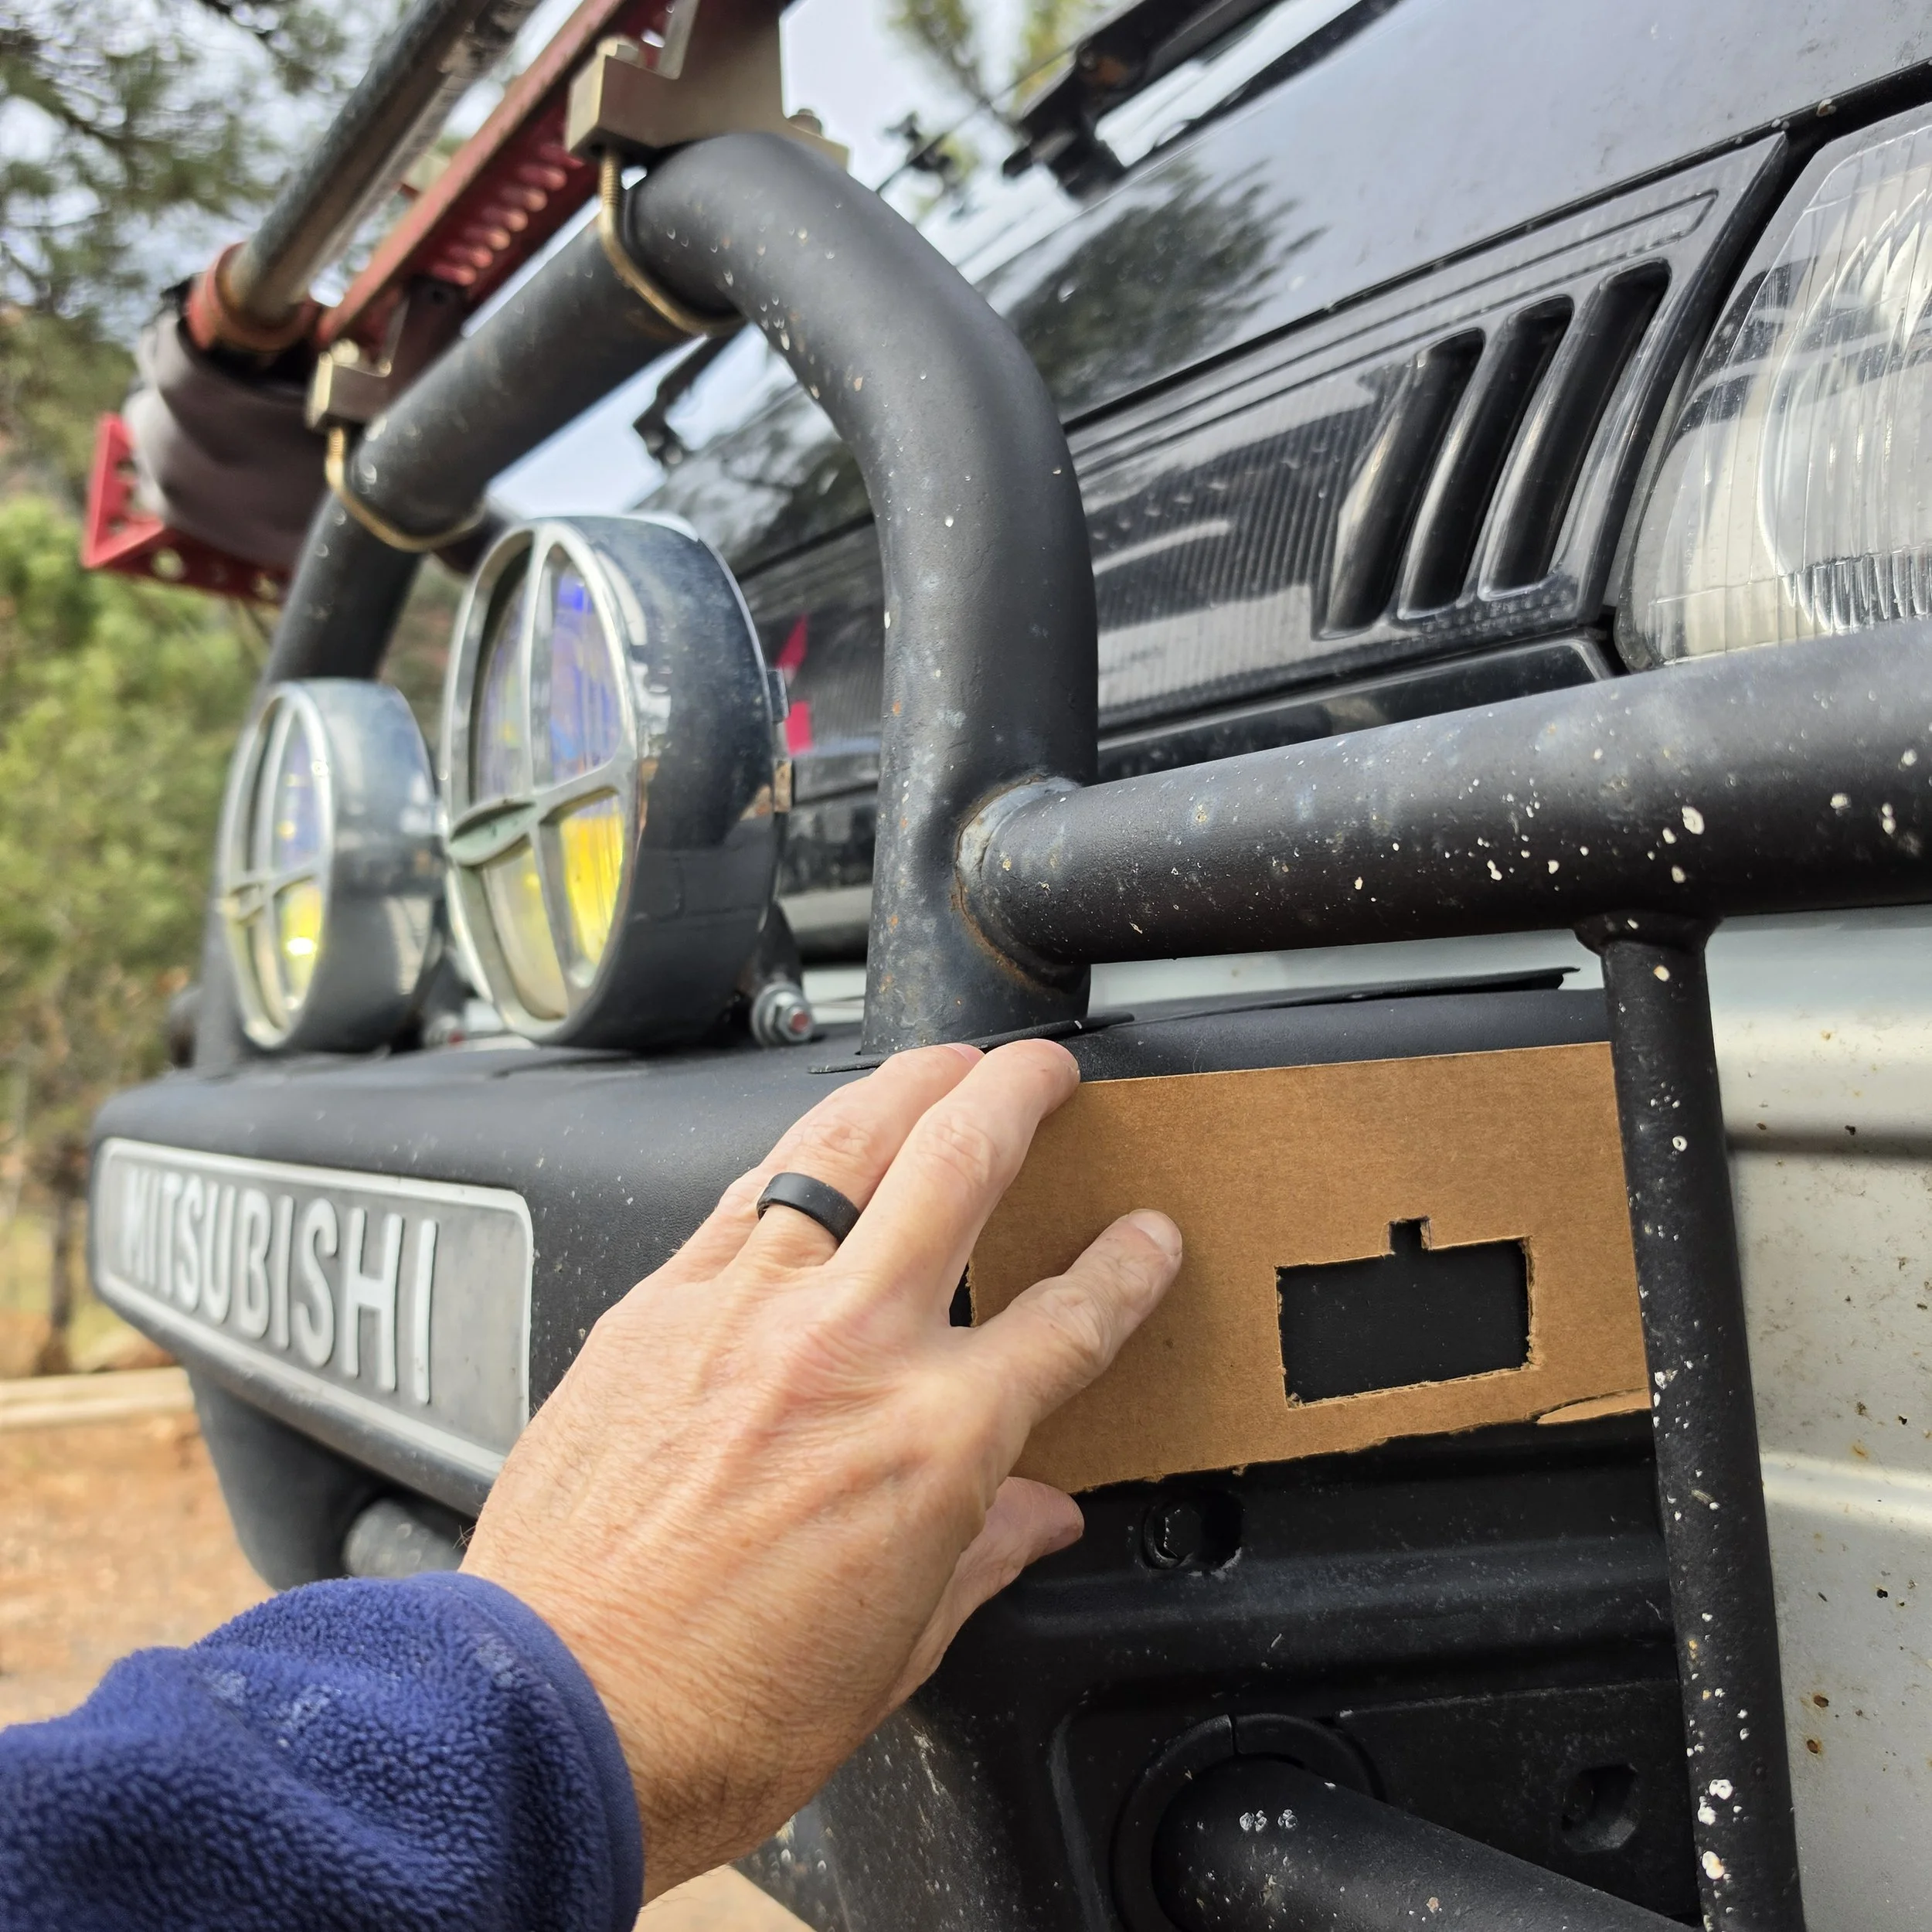
My original choice for the jump-start port's location. I needed enough clearance to plug in the external connector without interference from the bumper guard. Unfortunately, I hadn't yet fully accounted for the male connector and jumper cables.
After a little consideration, I settled on what seemed like a good spot.
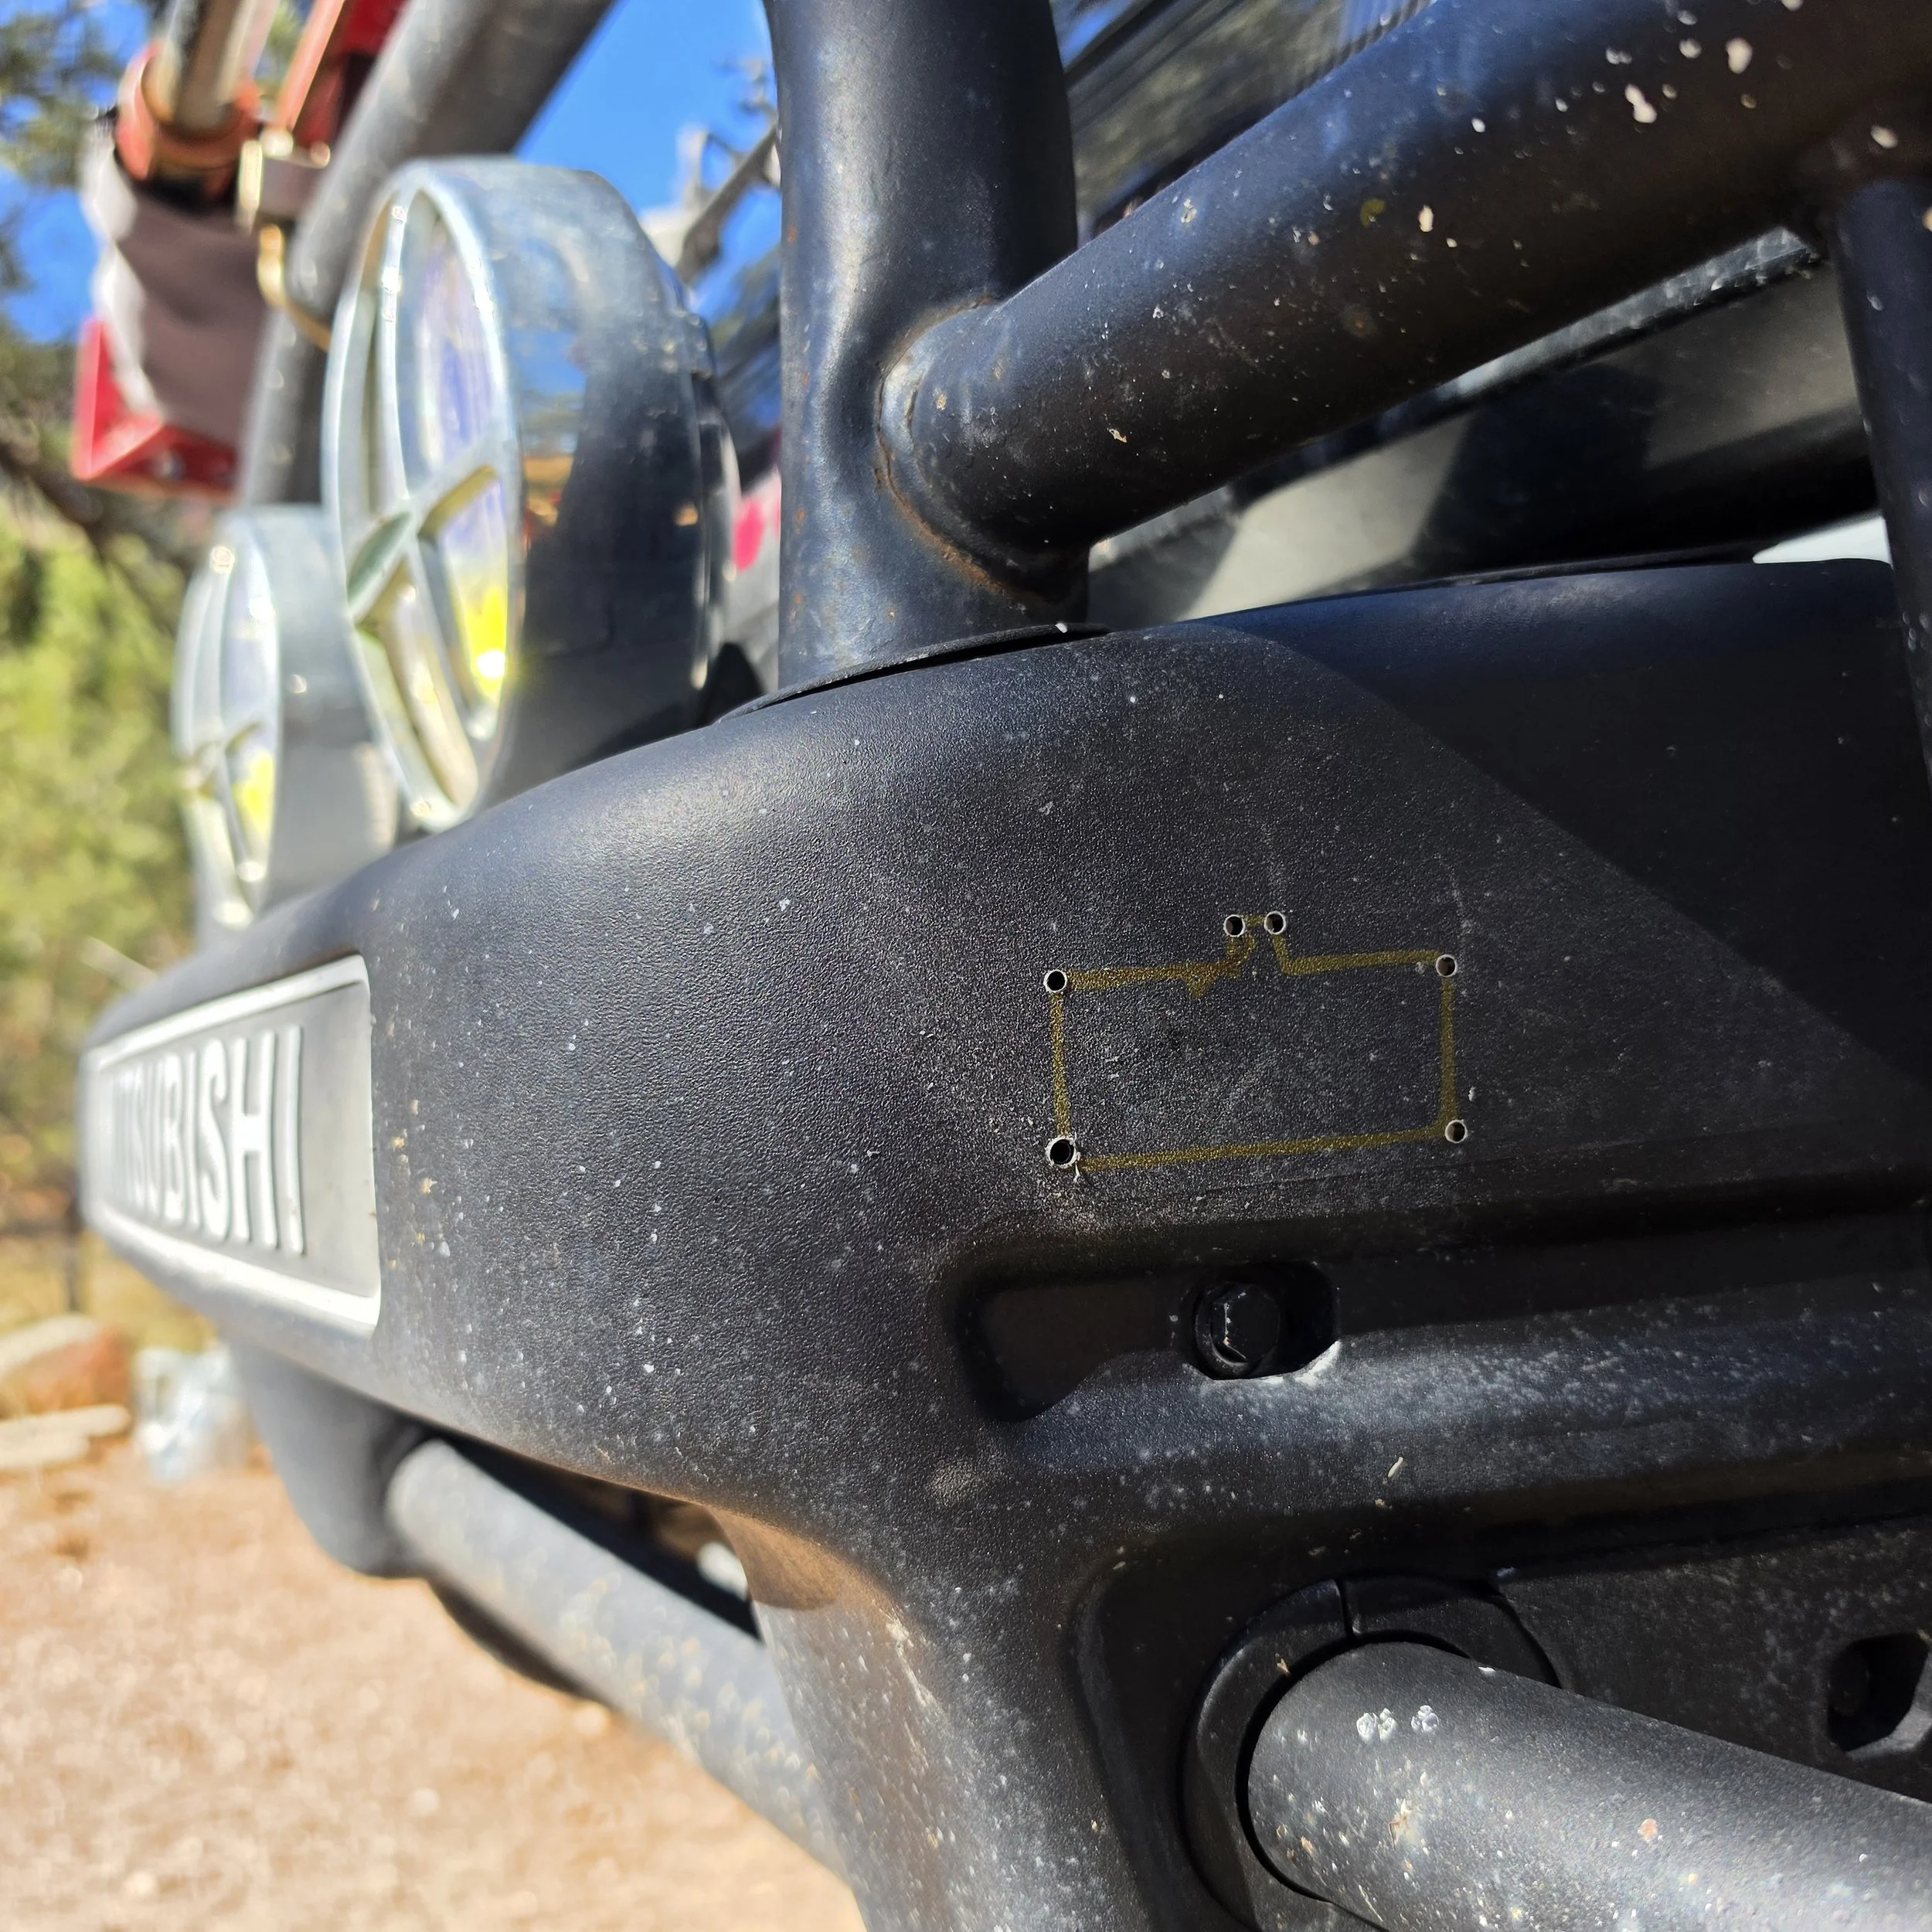
After accounting for the bumper guard and the clearance needed to connect the jumper cables, I'd finally settled on a location. Cutting lines marked. Pilot holes drilled. Everything looked good! Of course, I hadn't considered what was hiding inside the bumper. That little oversight was about to cost me.
Perfect.
Or so I thought.
Measure Twice. Cut Once. Check Behind the Bumper... Whatever…
As it turns out, there's tubing running inside the bumper.
Who knew?
Well, probably anyone who bothered to check before cutting a hole.
Apparently, that didn't include me.
I'd chosen a location that worked beautifully from the outside. Unfortunately, the inside of the bumper had other plans.
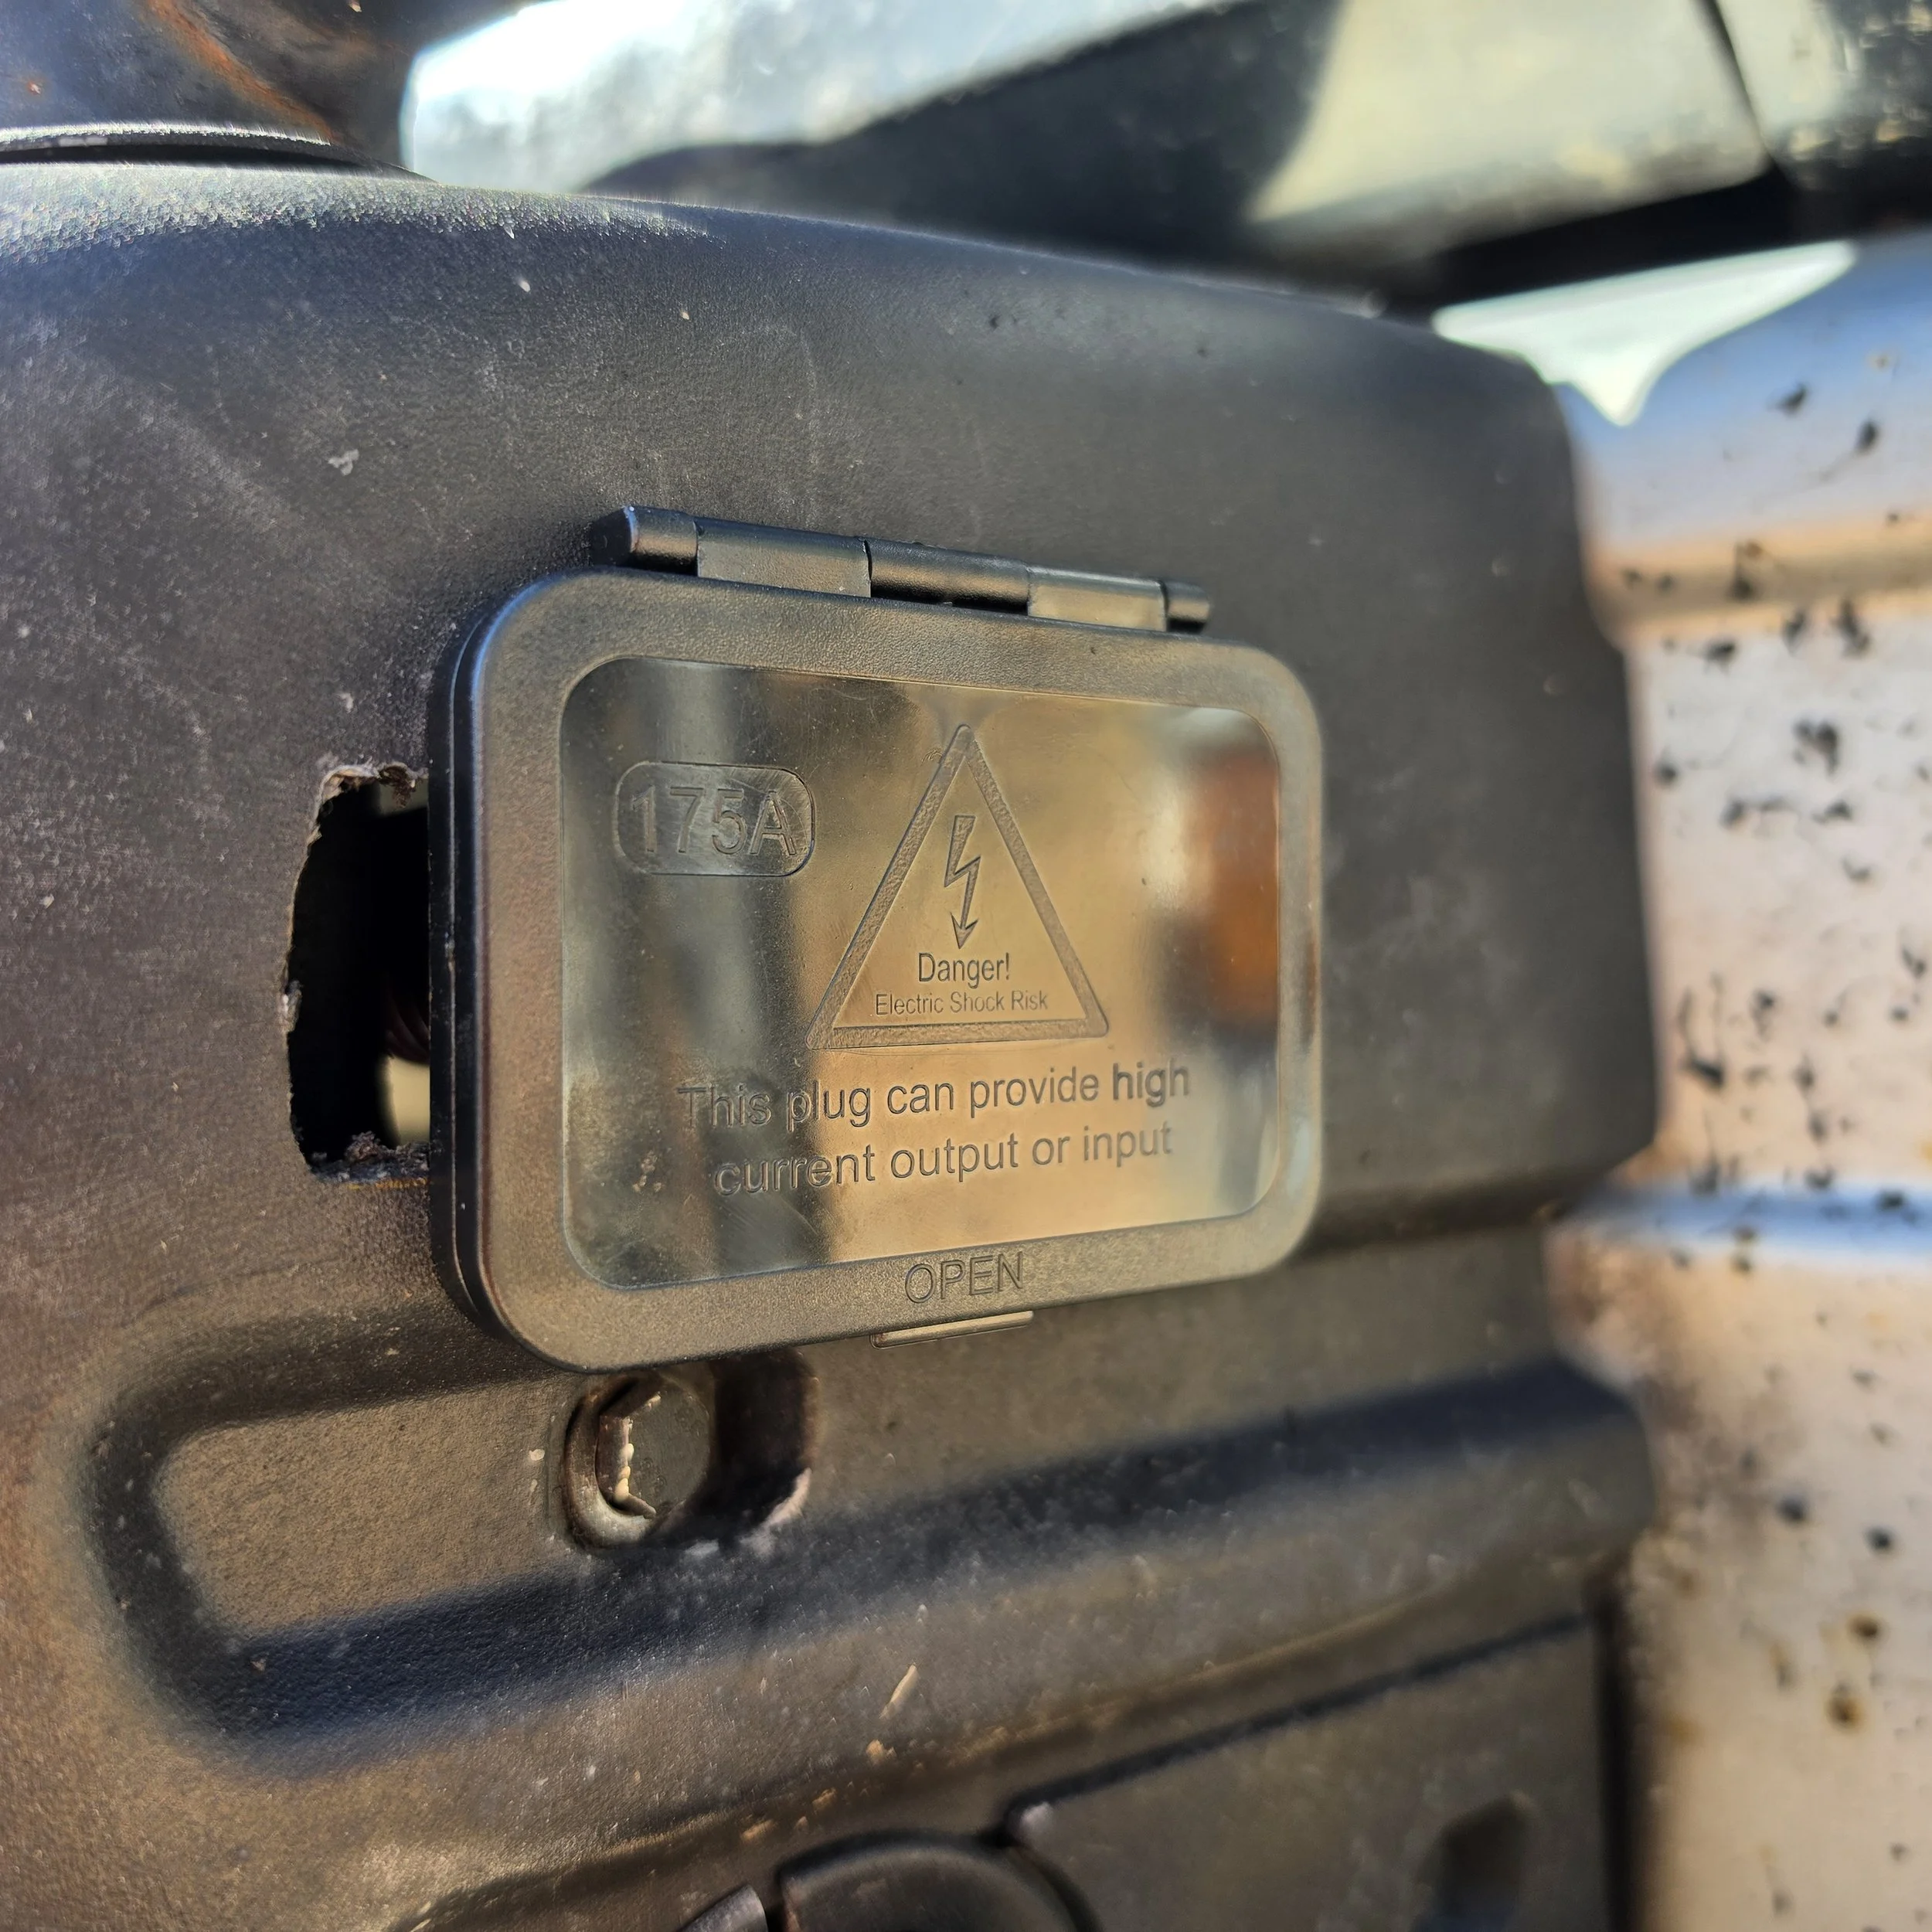
The port wasn't going to fit where I'd started cutting.
Wonderful.
Time for Plan B.
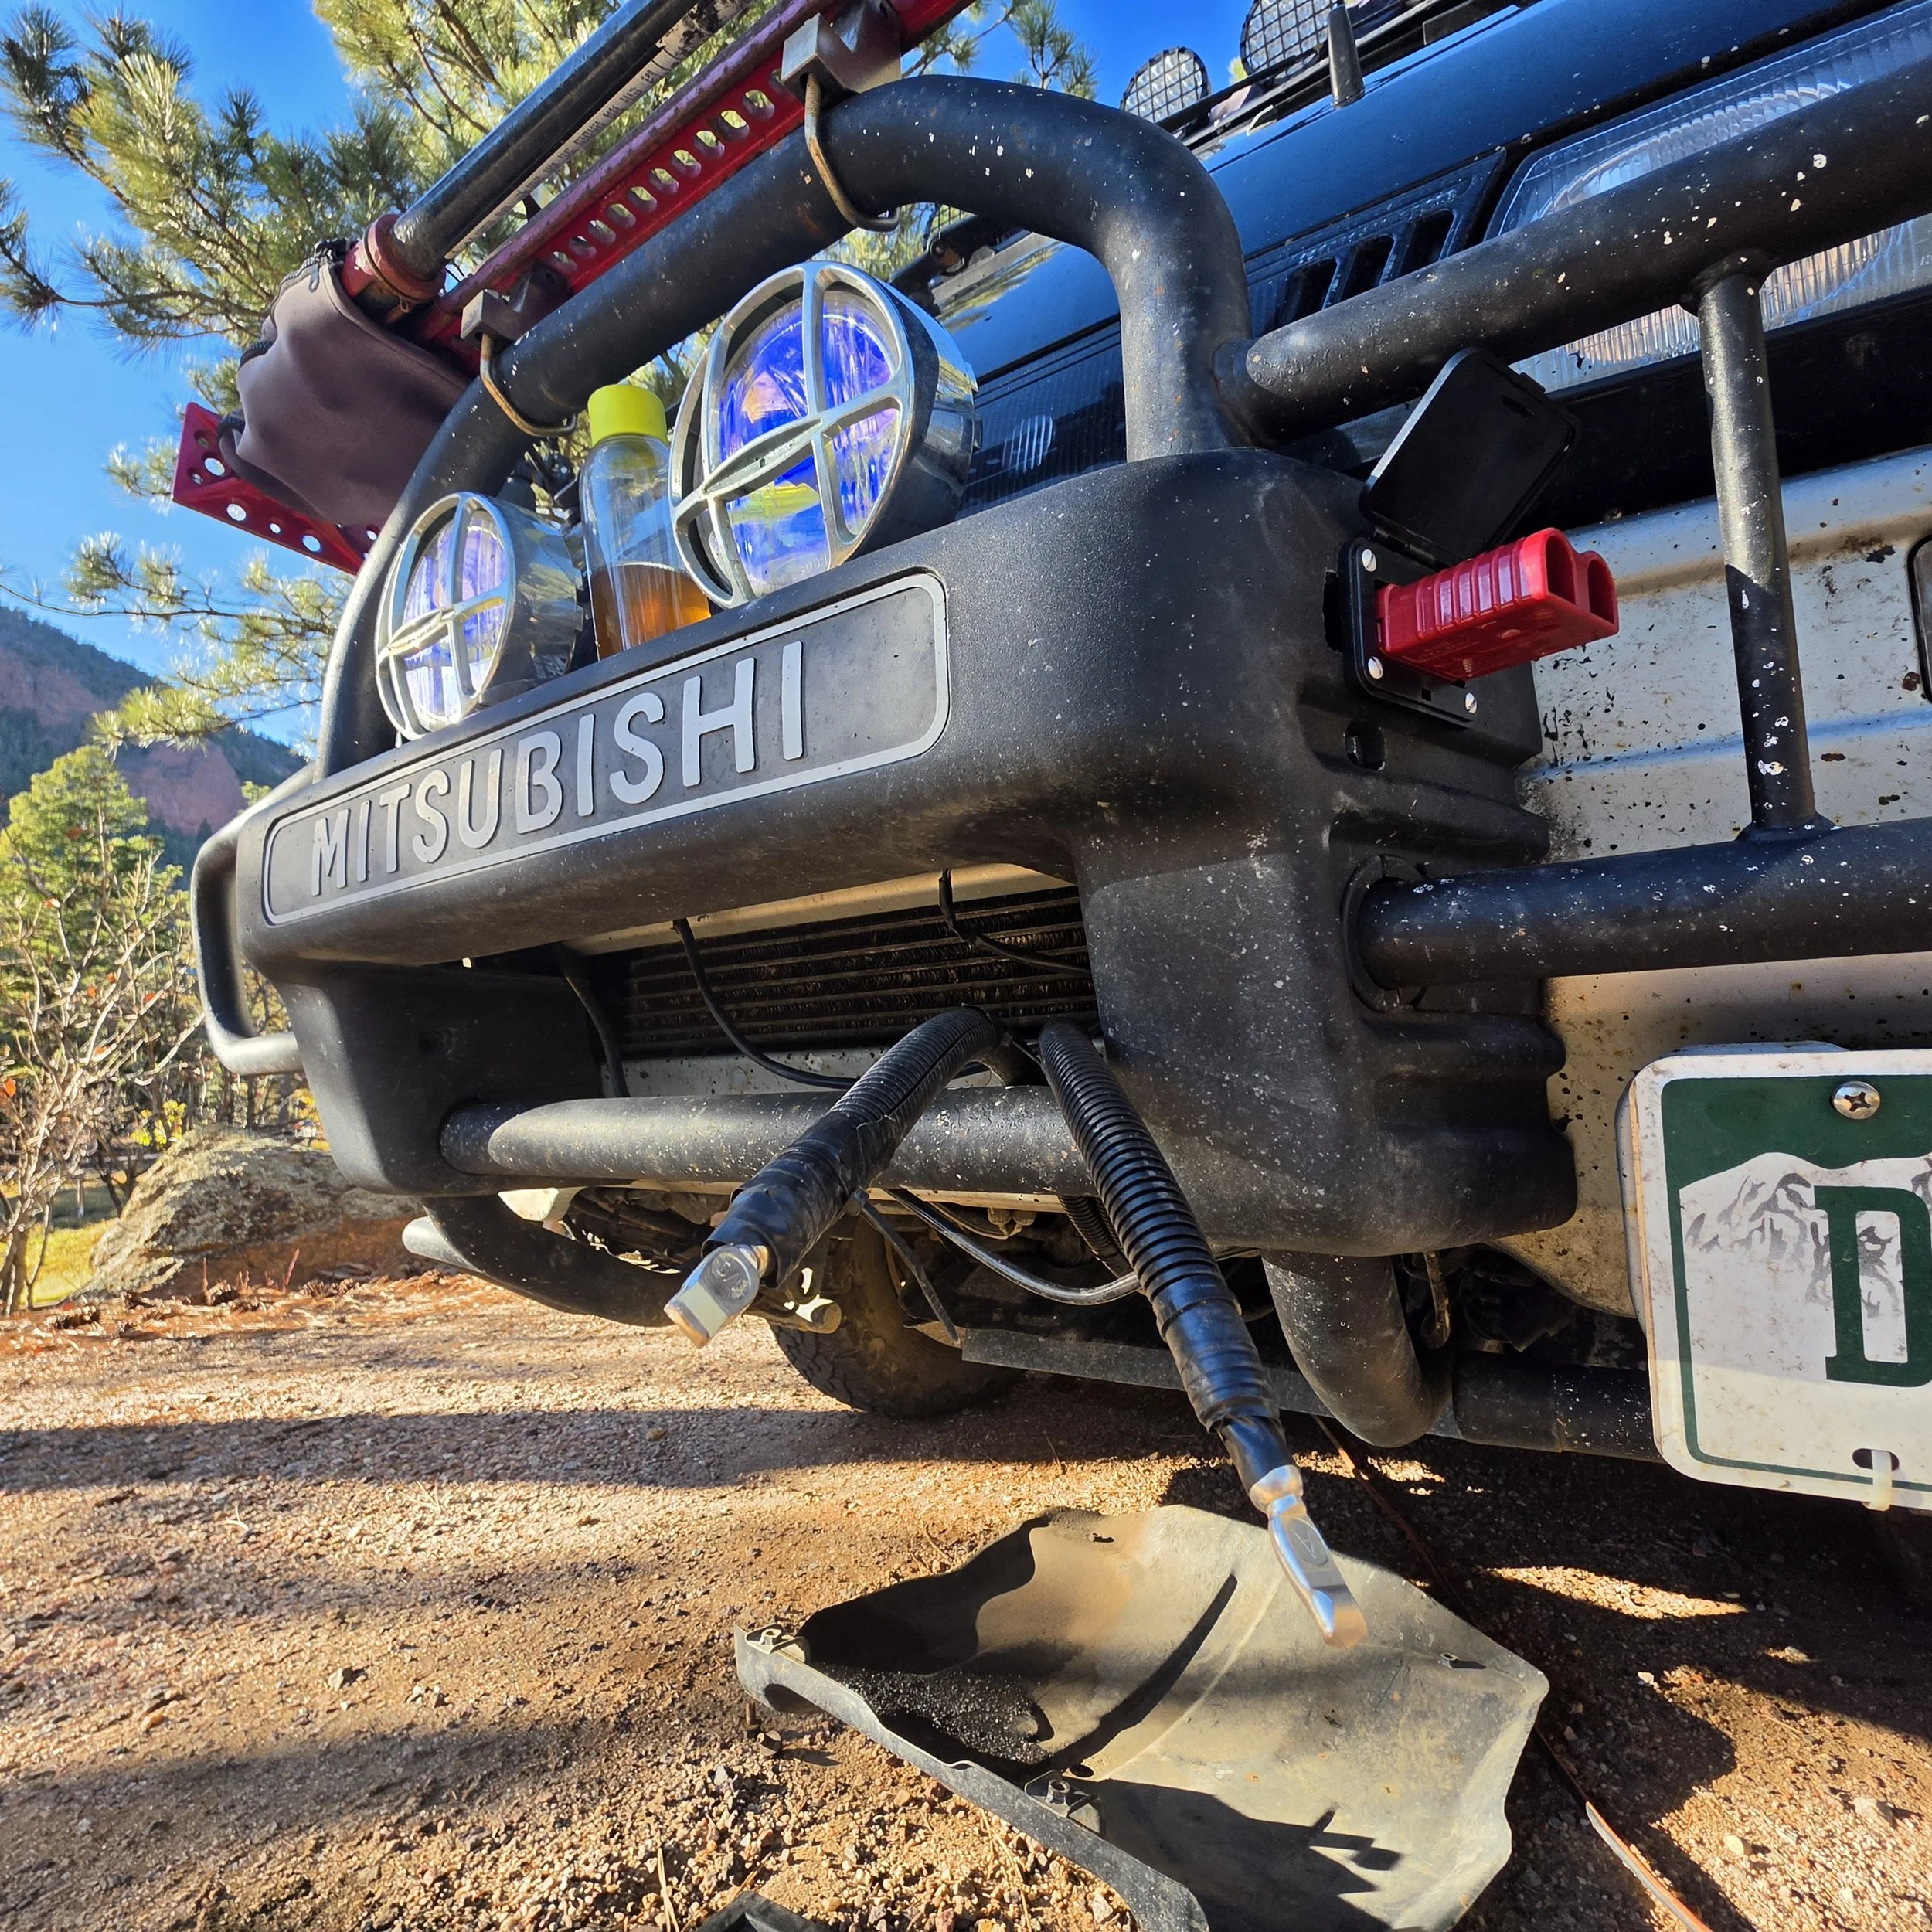
I moved the opening a little farther aft, where I could clear the obstruction and still have enough room to connect the external cables.
This time, everything fit.
Unfortunately, I now had a perfectly functional mounting location accompanied by a decidedly nonfunctional, ugly hole where I'd made my first attempt.
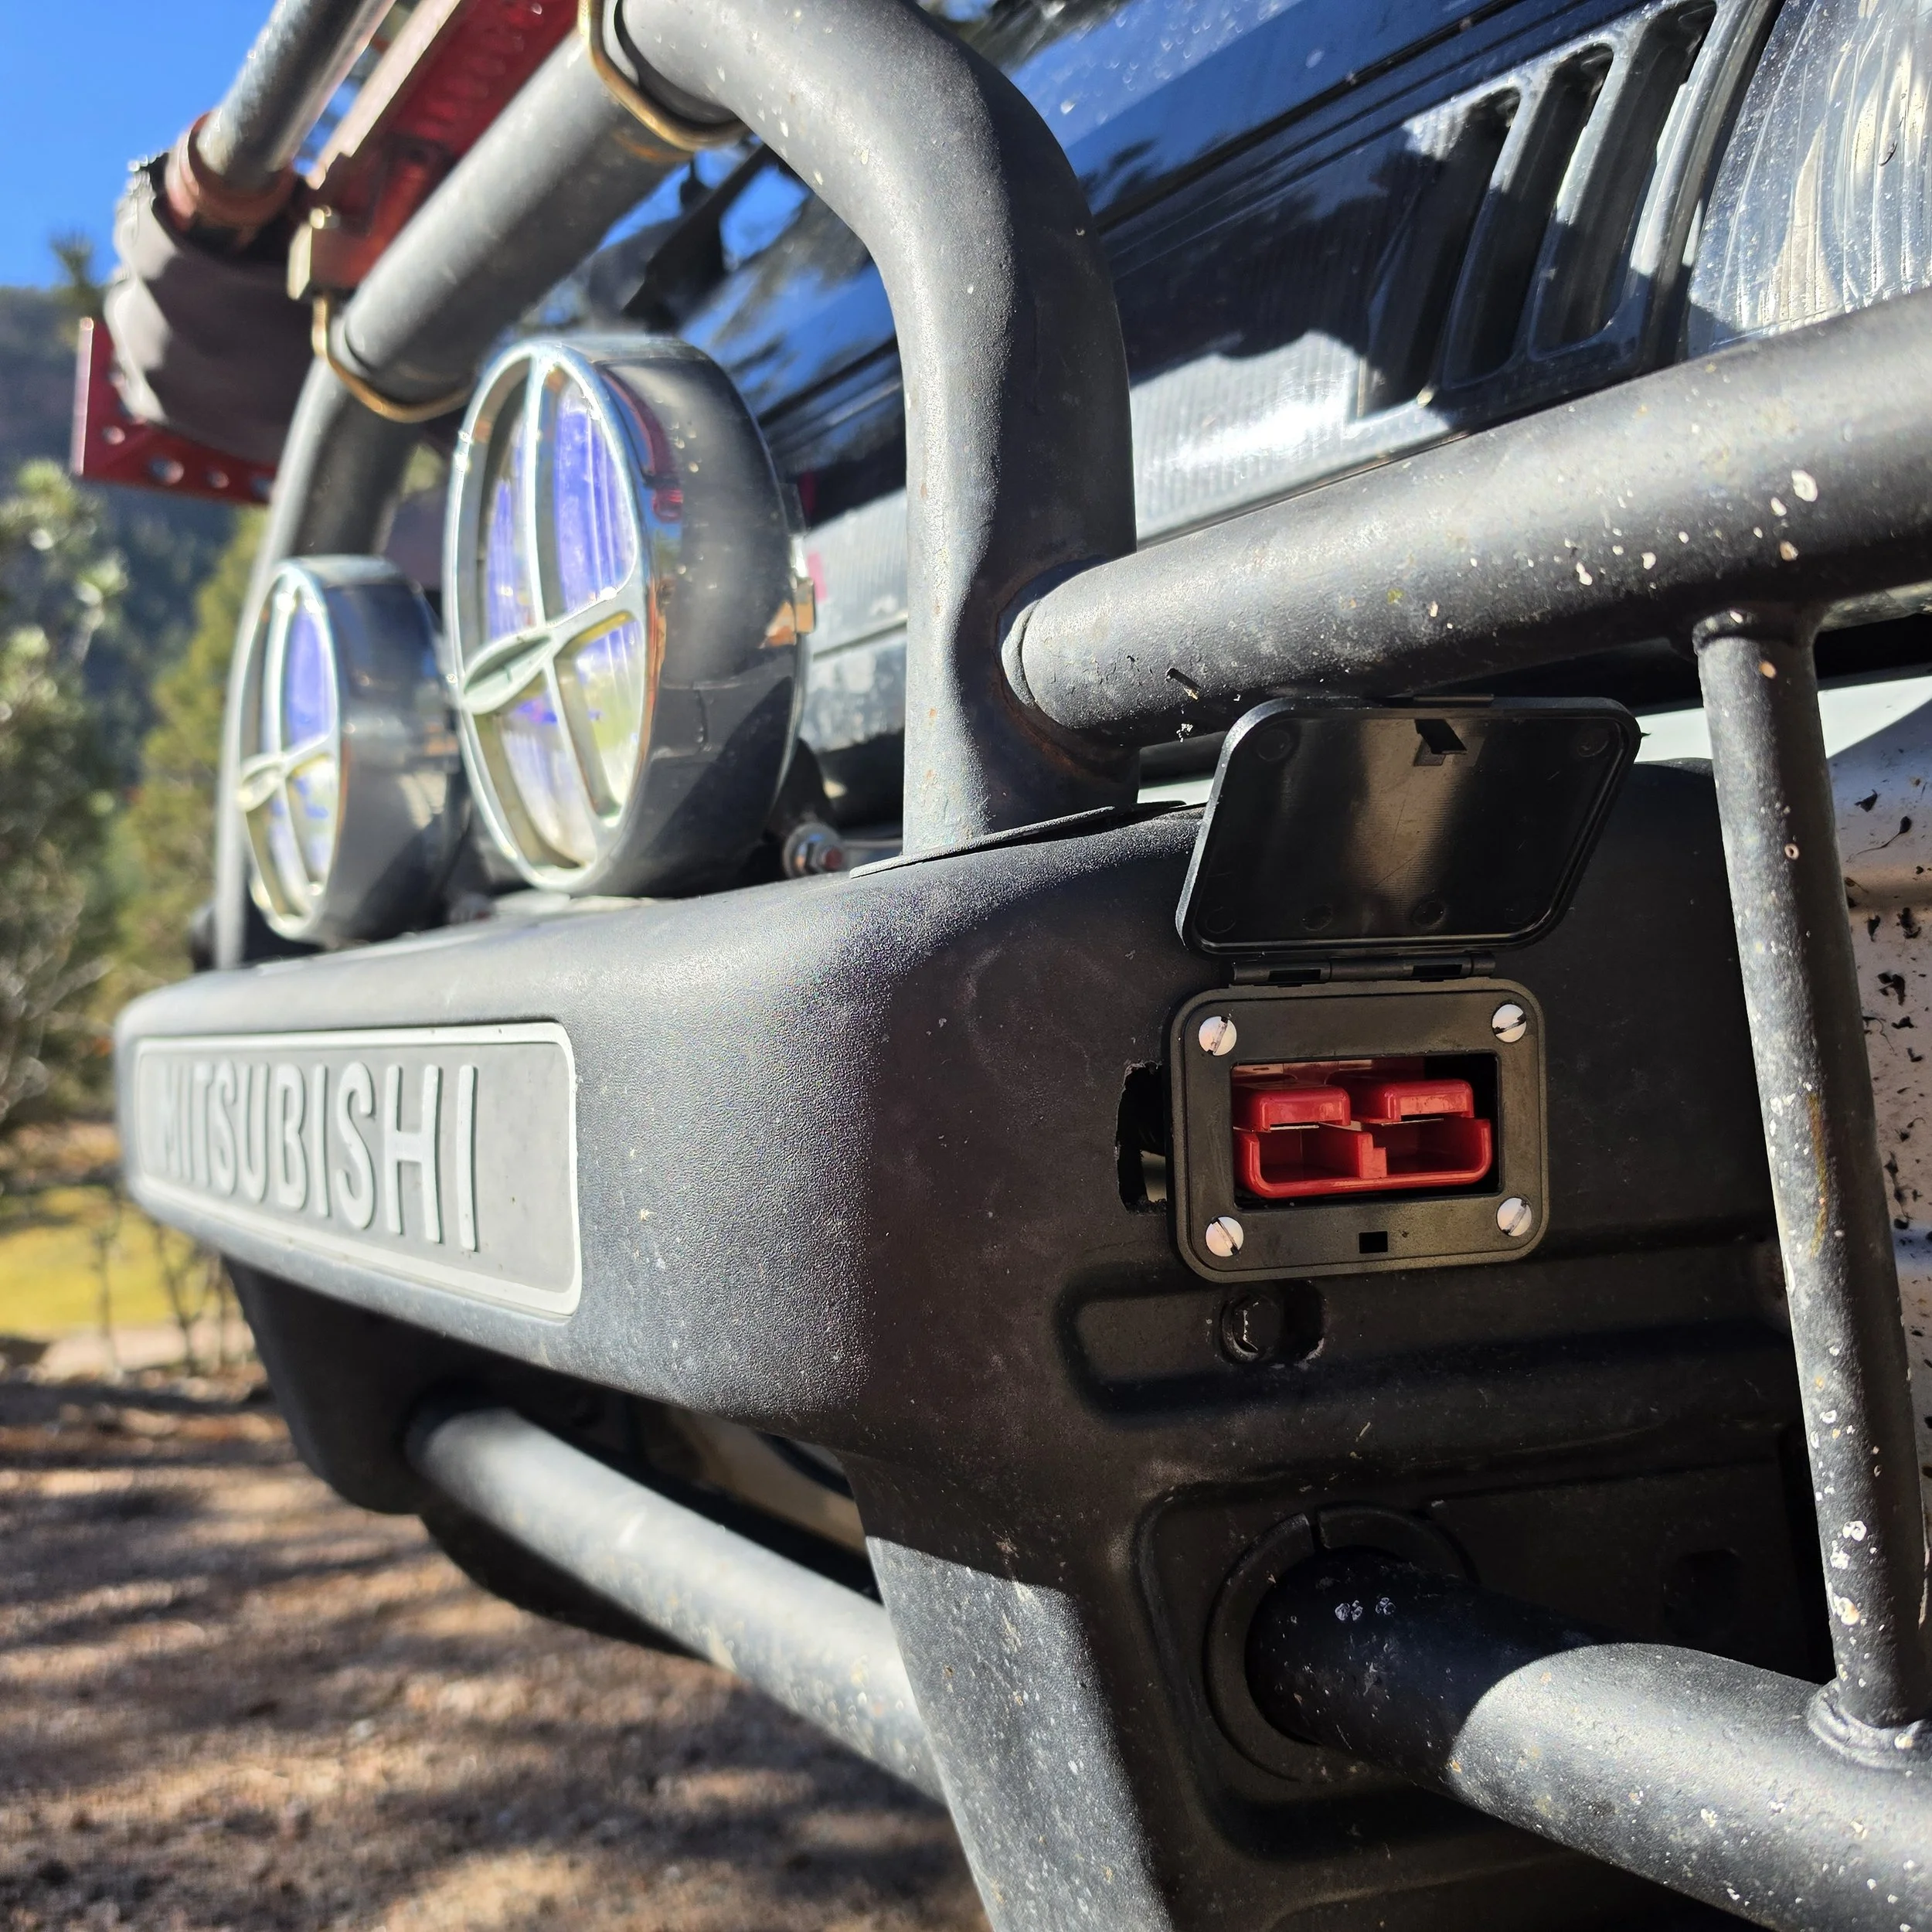
I suppose I could have left it.
But I knew it was there.
And that meant it was going to bother me every single time I looked at the bumper.
Fixing My Mistake
With the port installed in its final location, I turned my attention to repairing the evidence of my earlier enthusiasm.
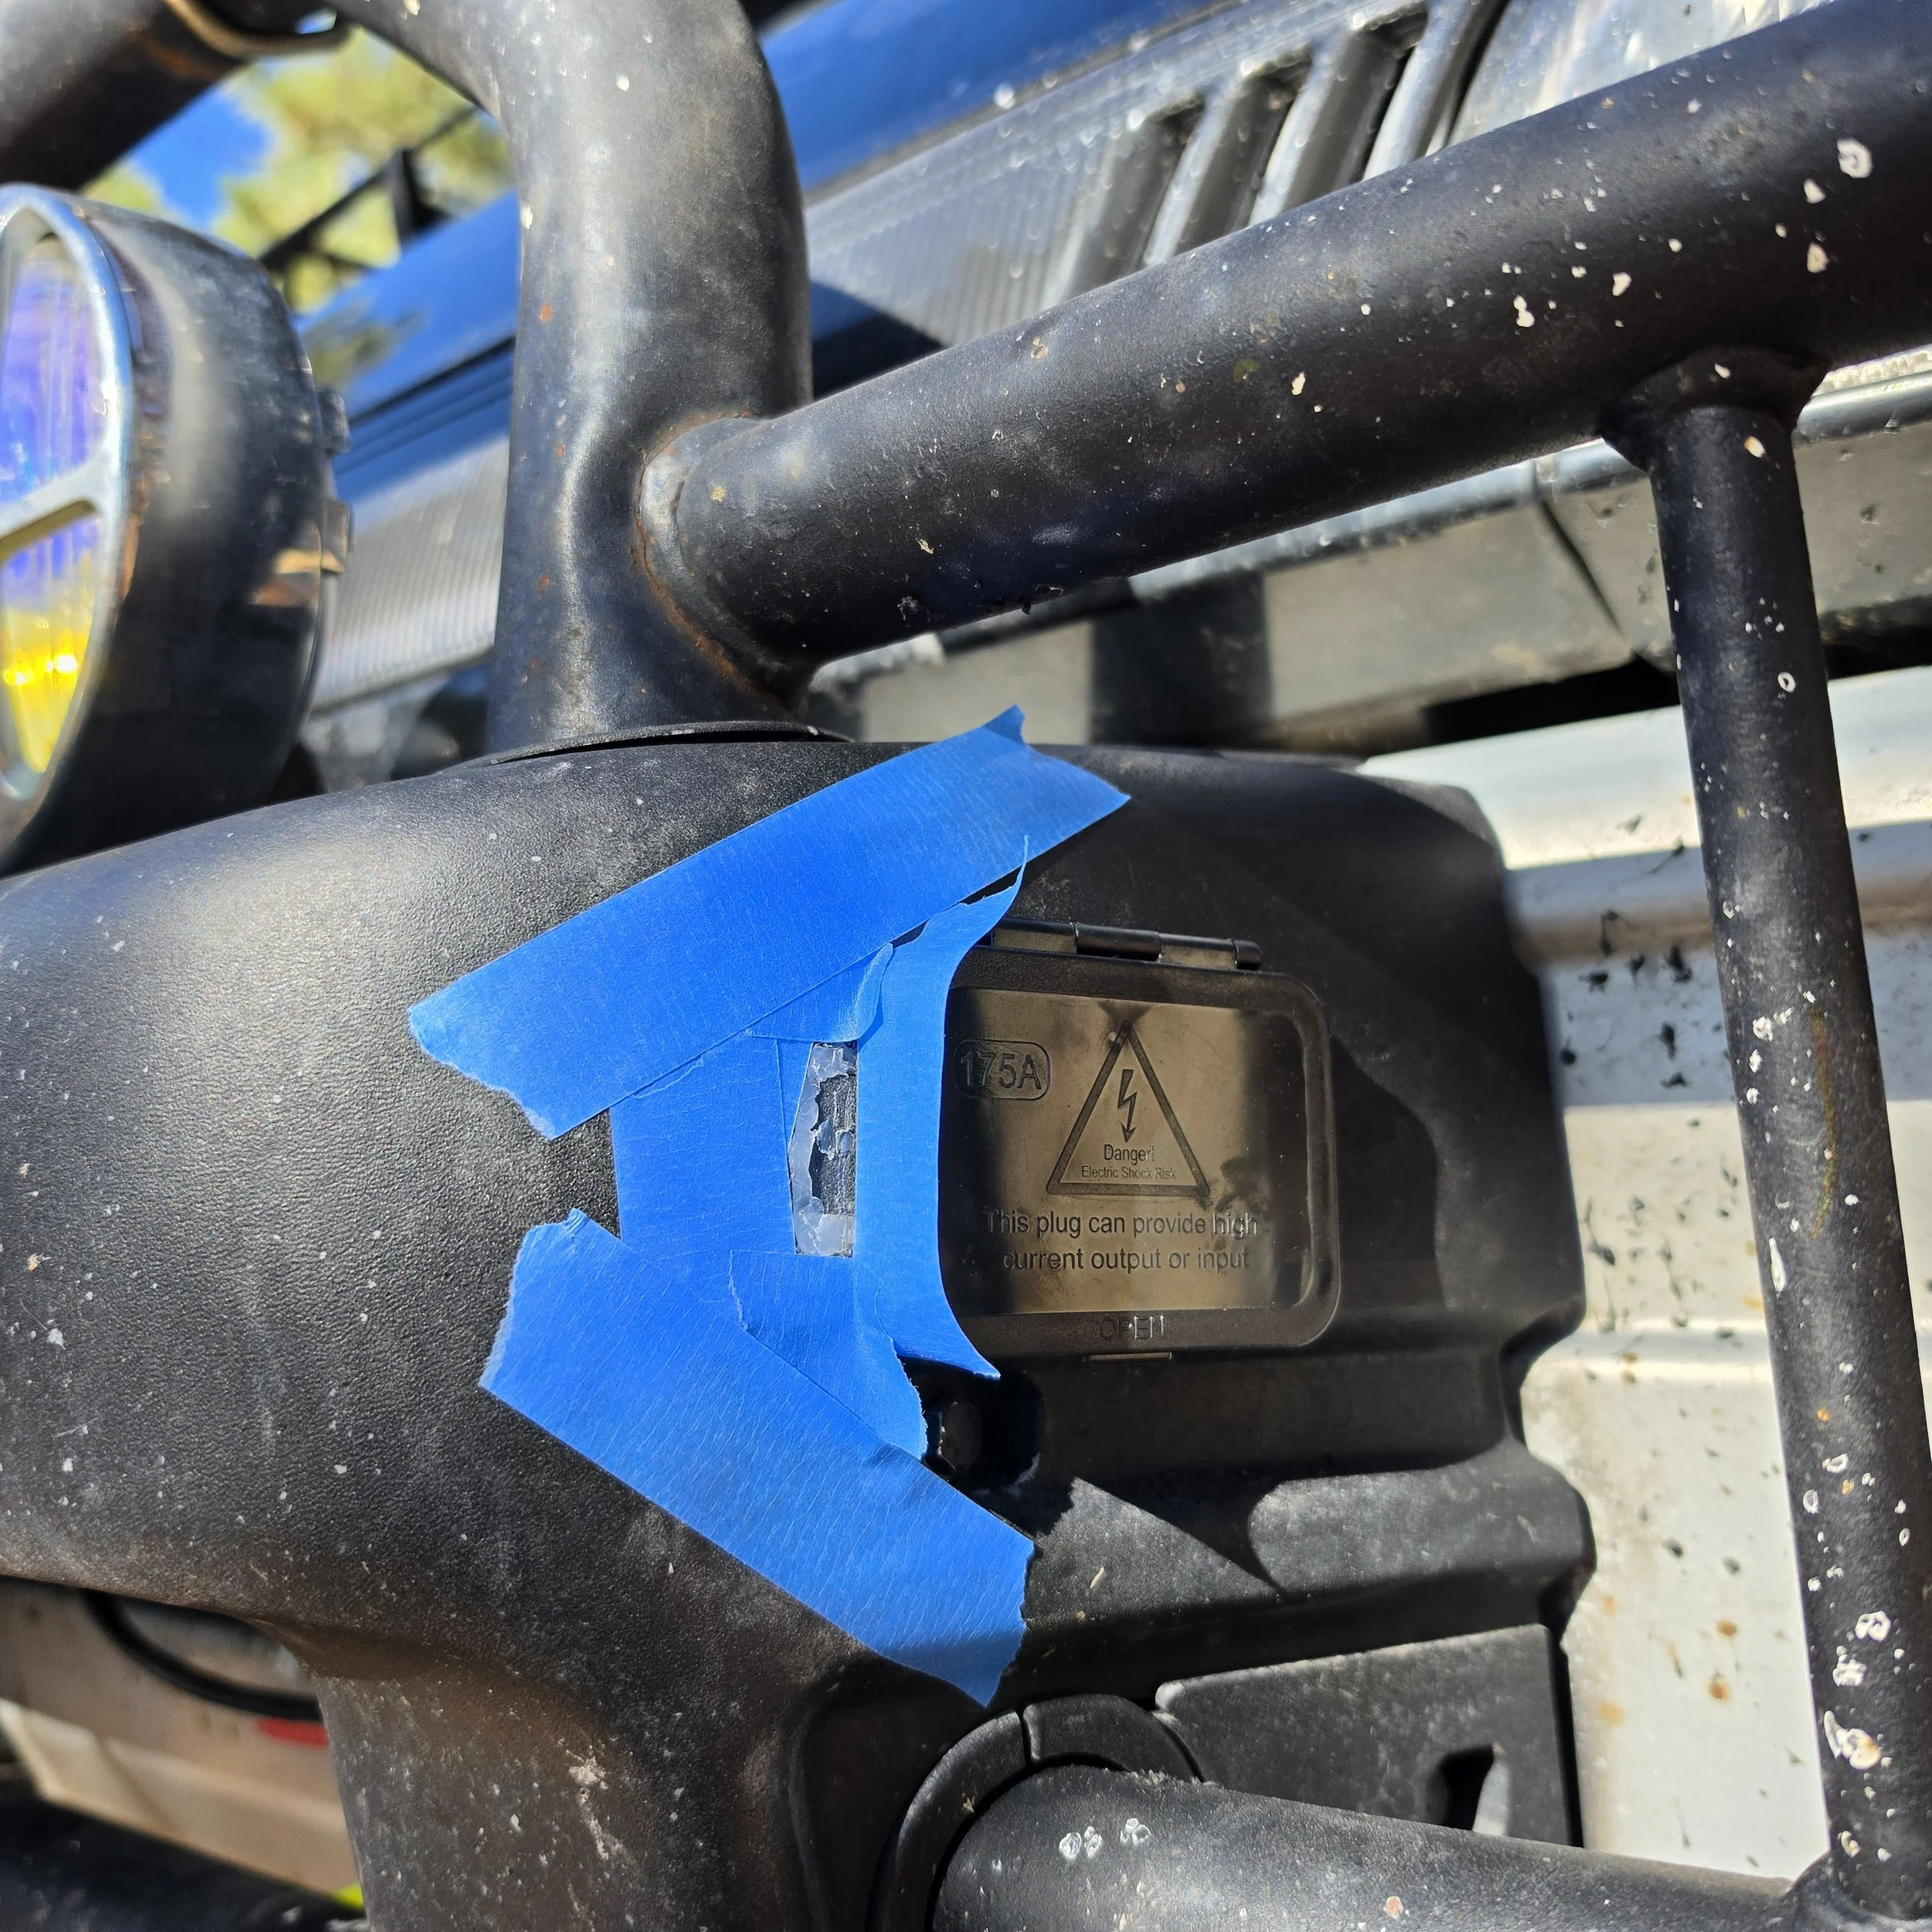
Fortunately, I had some plastic from the bumper that I could use to fill the unwanted opening.
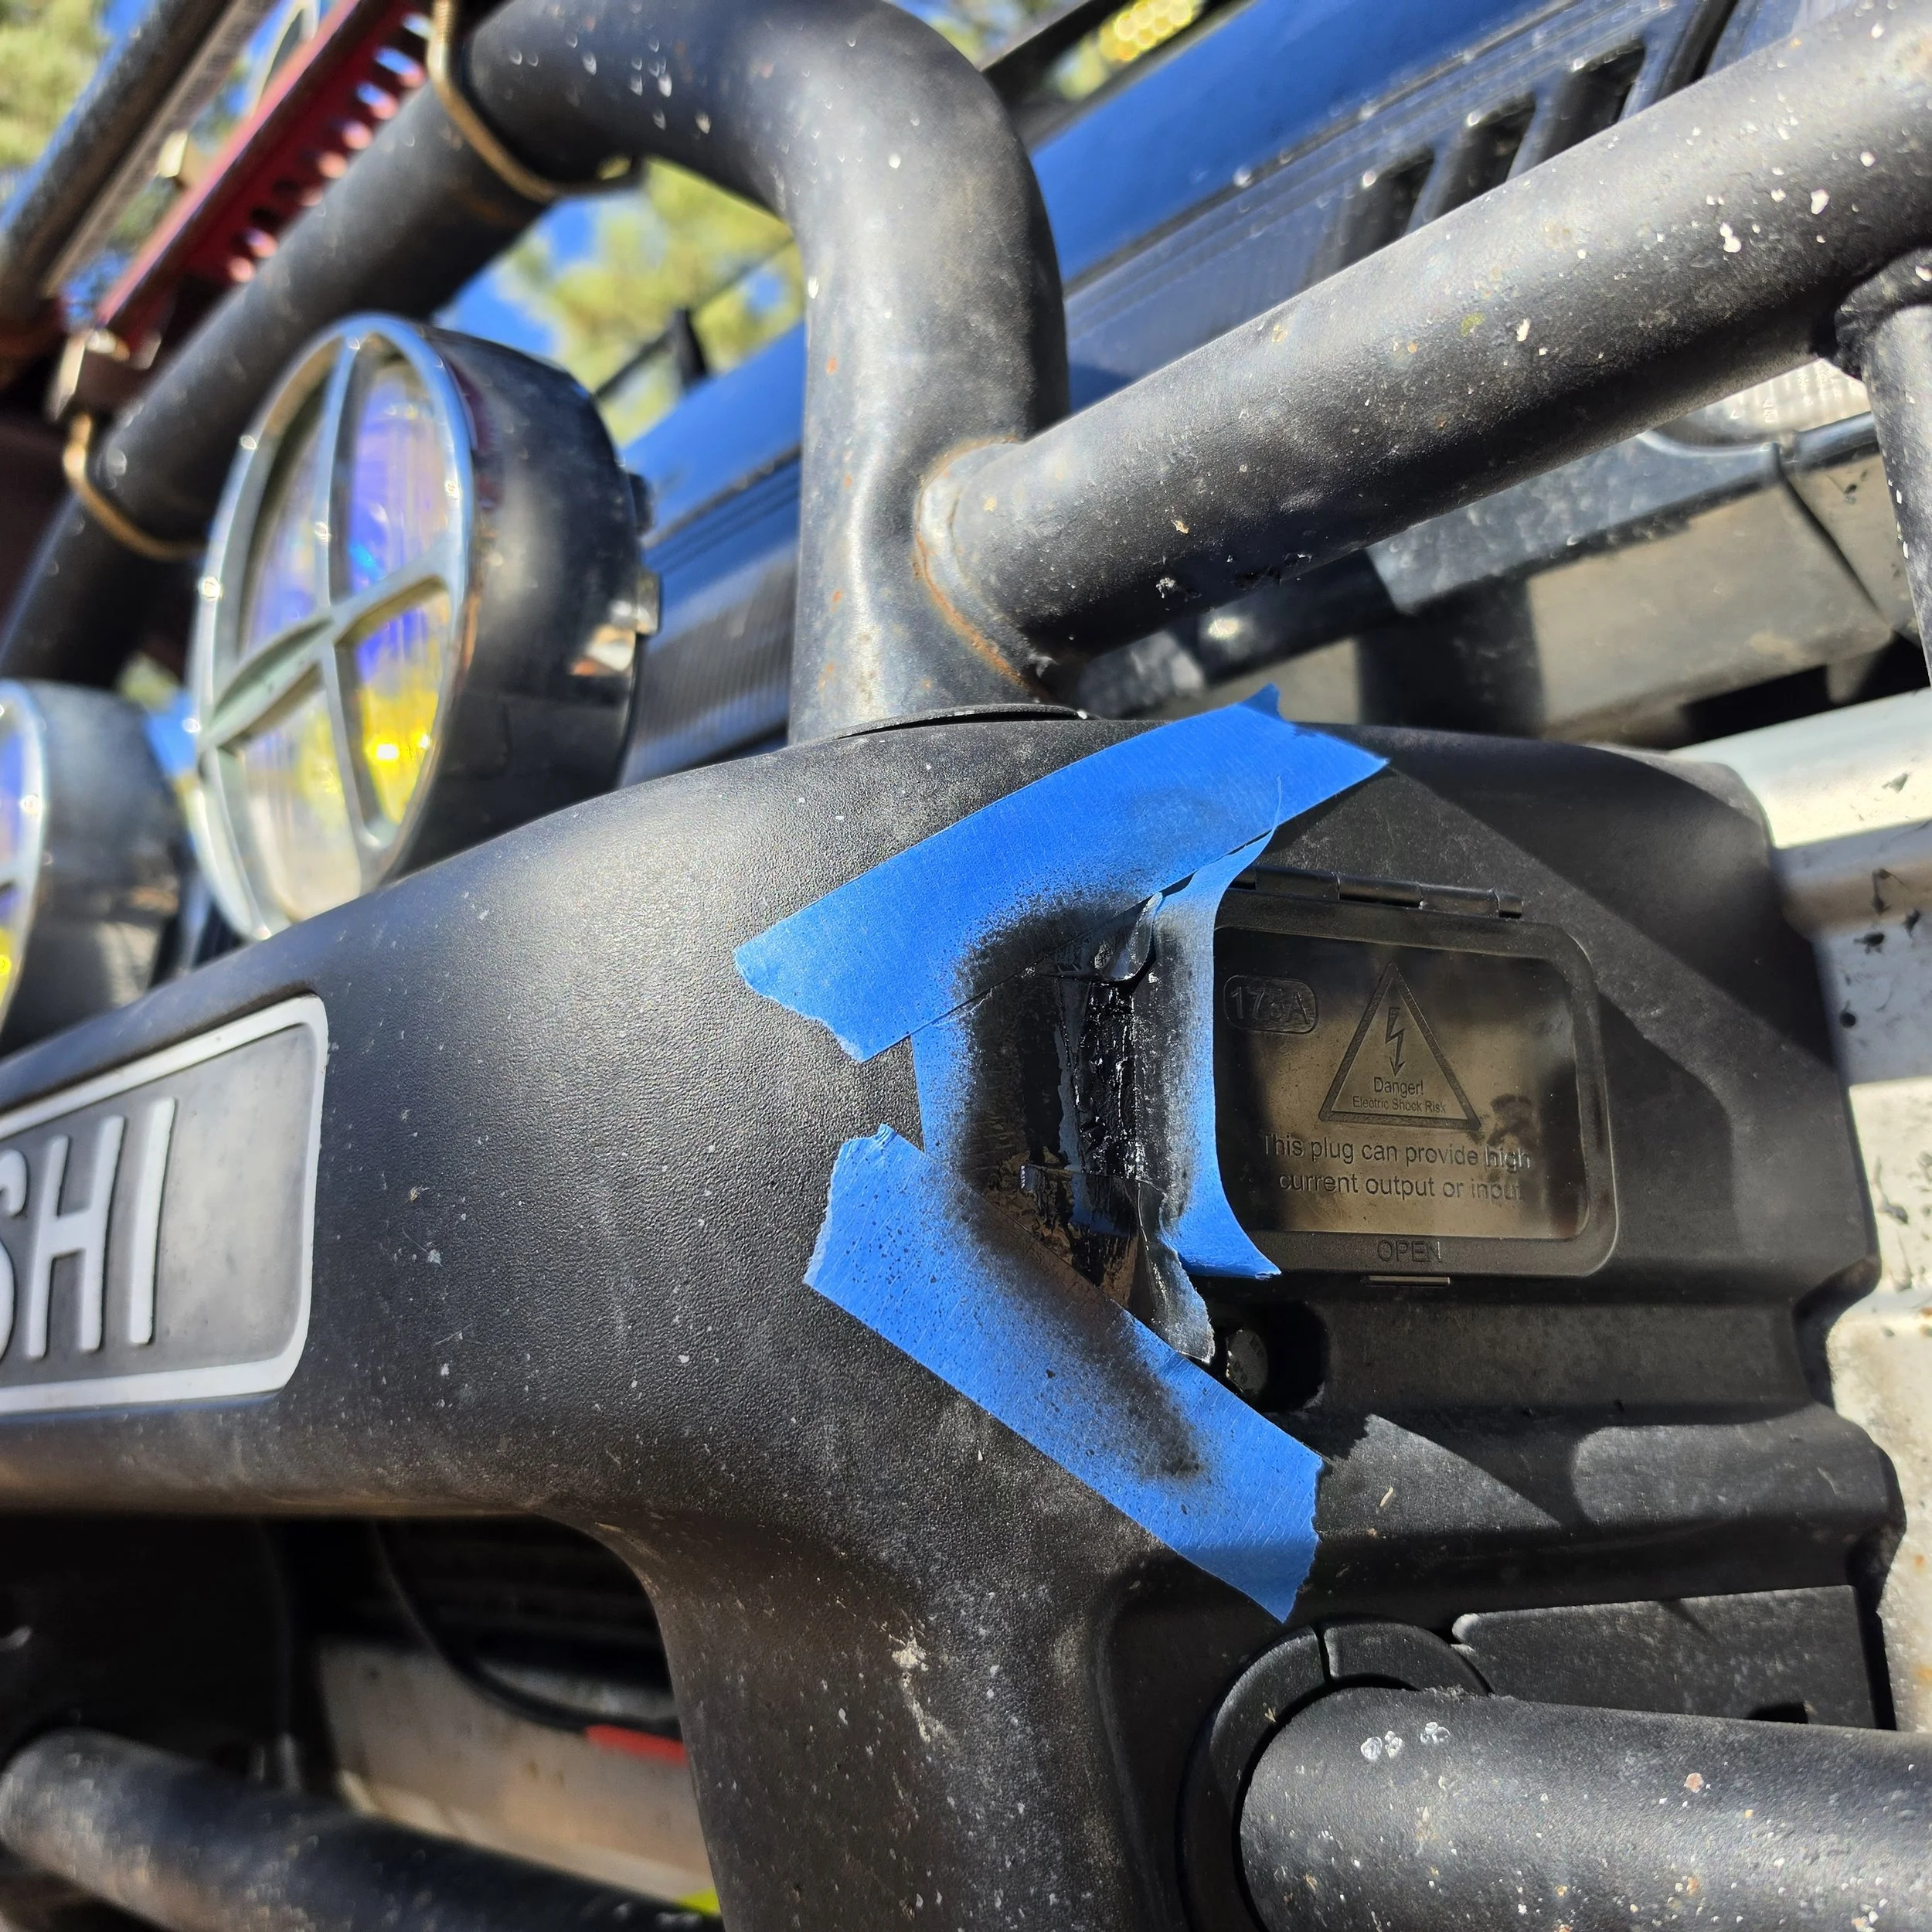
I shaped the material to fit the hole, secured the edges with adhesive, and worked on blending the repair into the surrounding bumper.
Then came the paint.
A little preparation, a little spraying, and a little patience.
It wasn't exactly how I'd envisioned spending part of this project, but the repair turned out well enough that I could move on without constantly staring at my mistake.
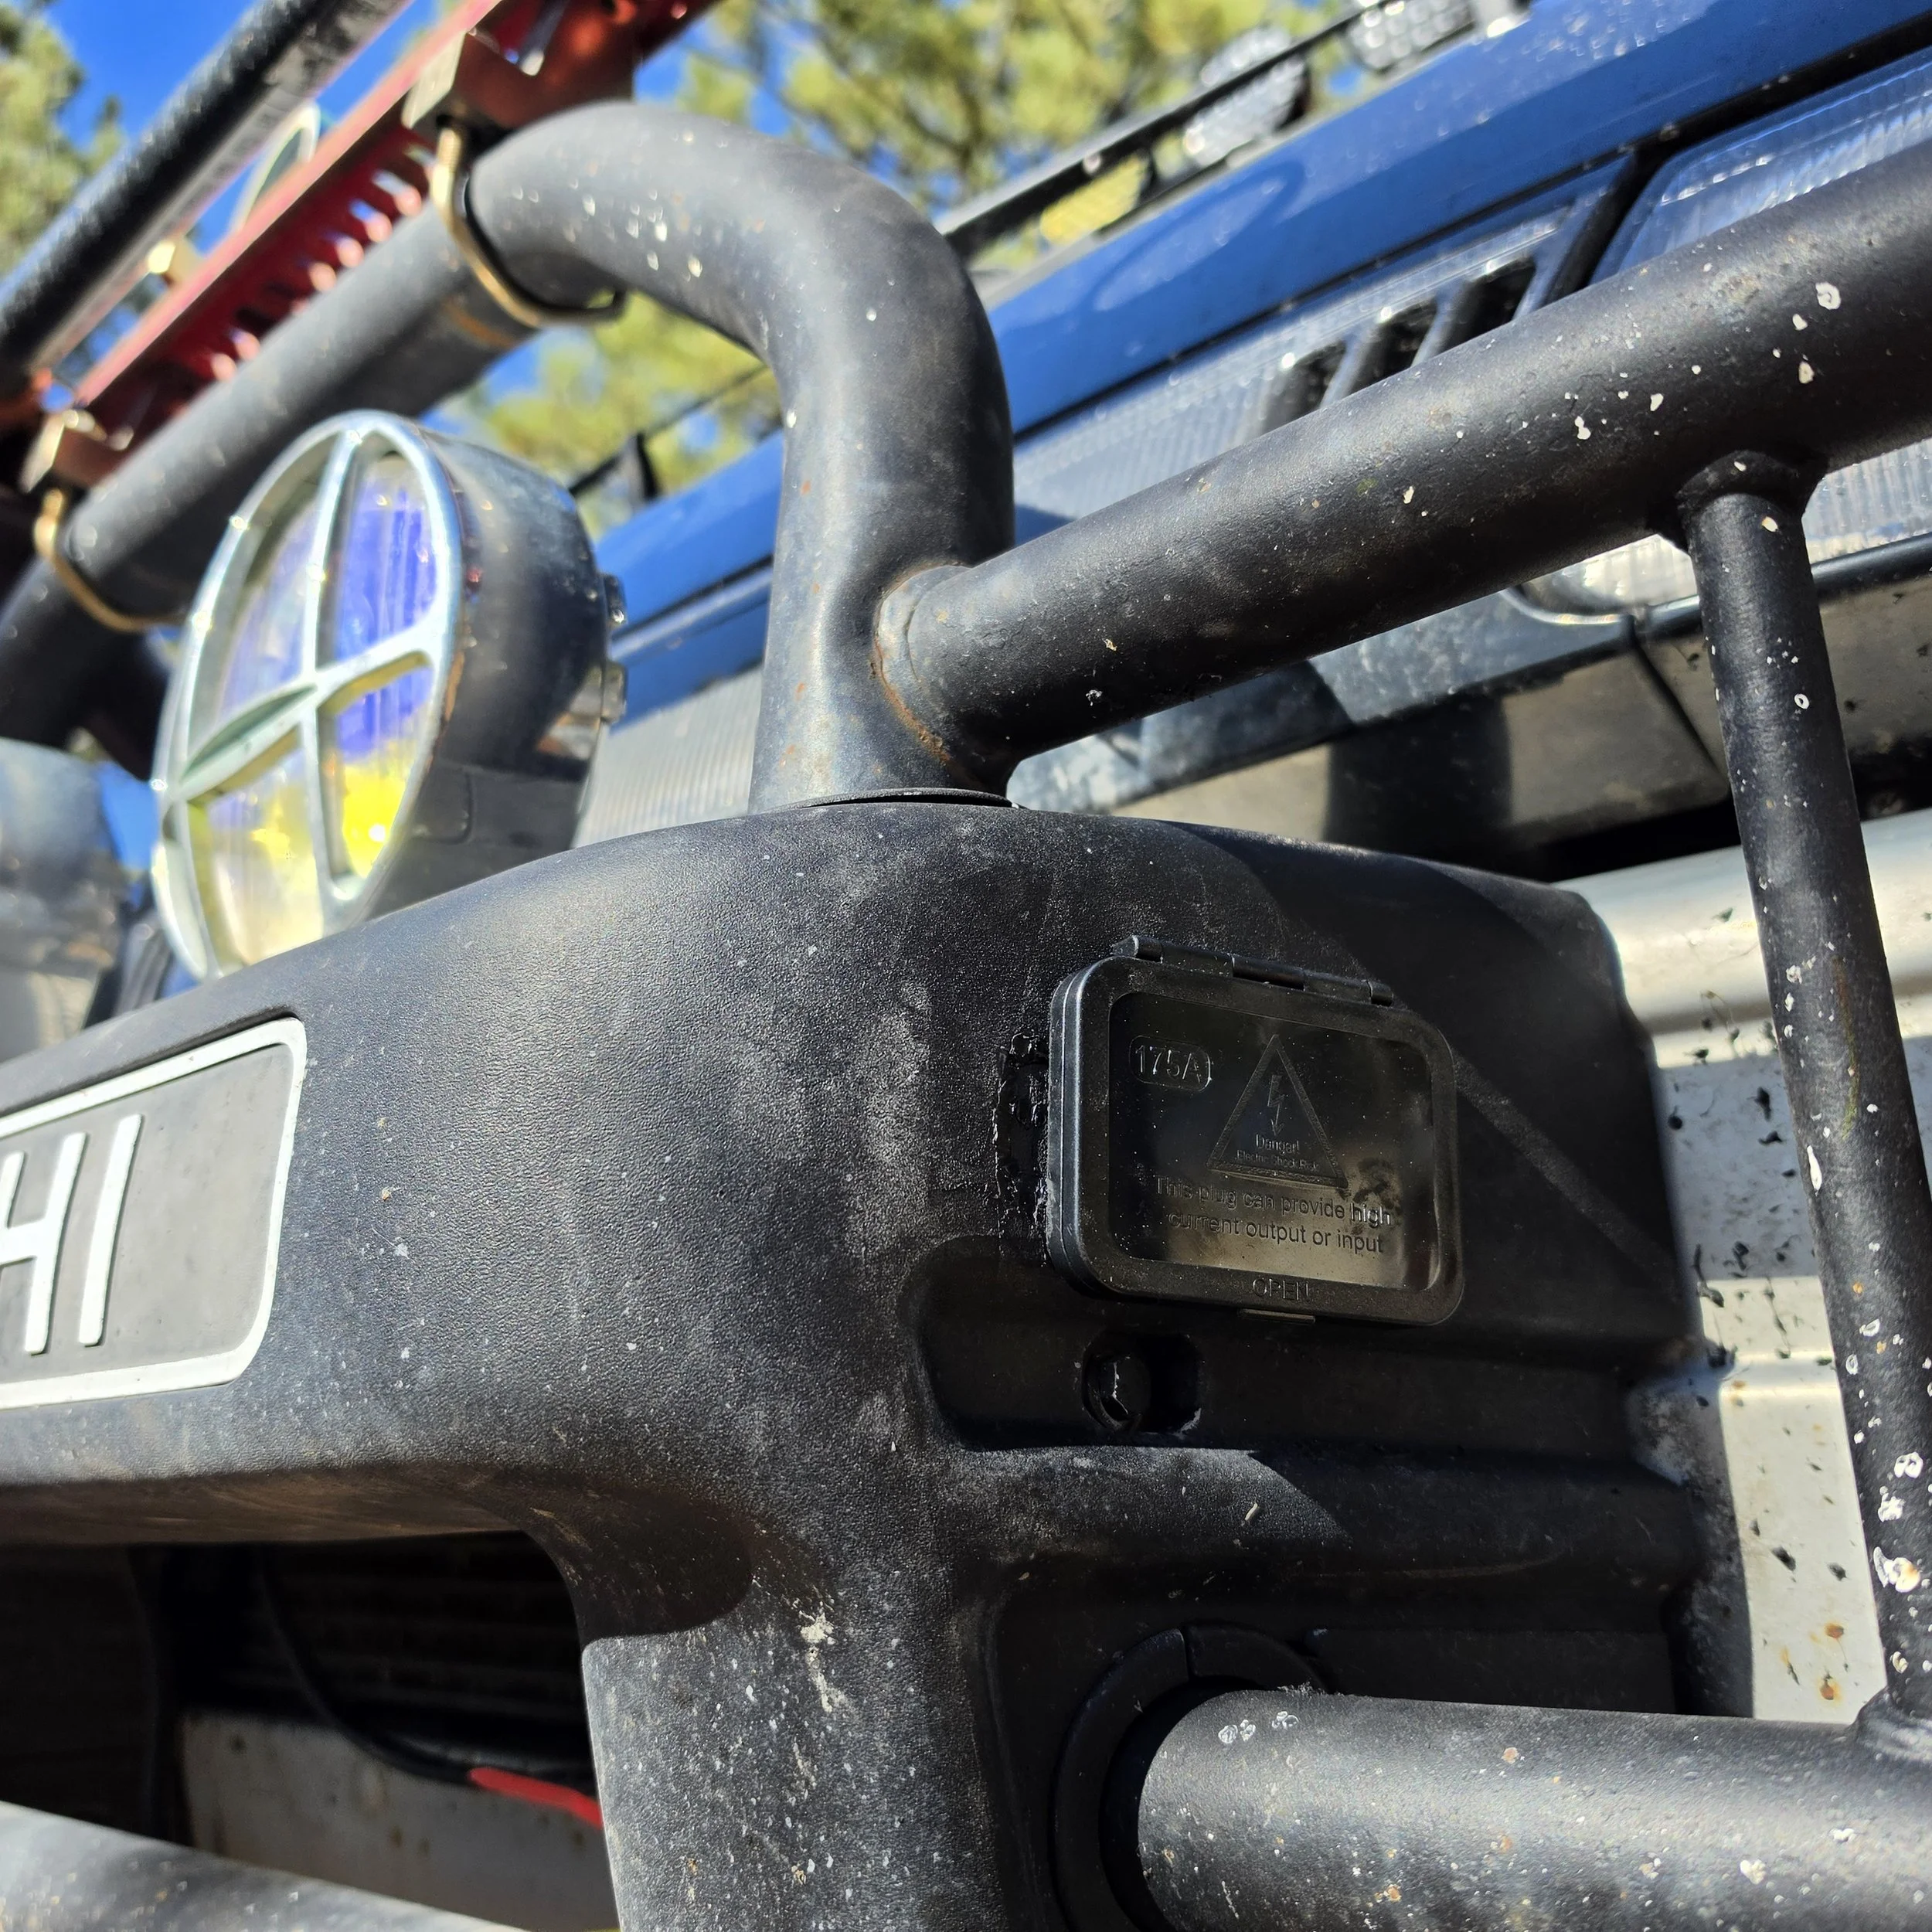
Lesson learned.
Next time, I'll check what's behind the surface before introducing it to a cutting tool.
Probably.
Running the Cables
With the port mounted, it was time to connect it to the Delica's starting battery.
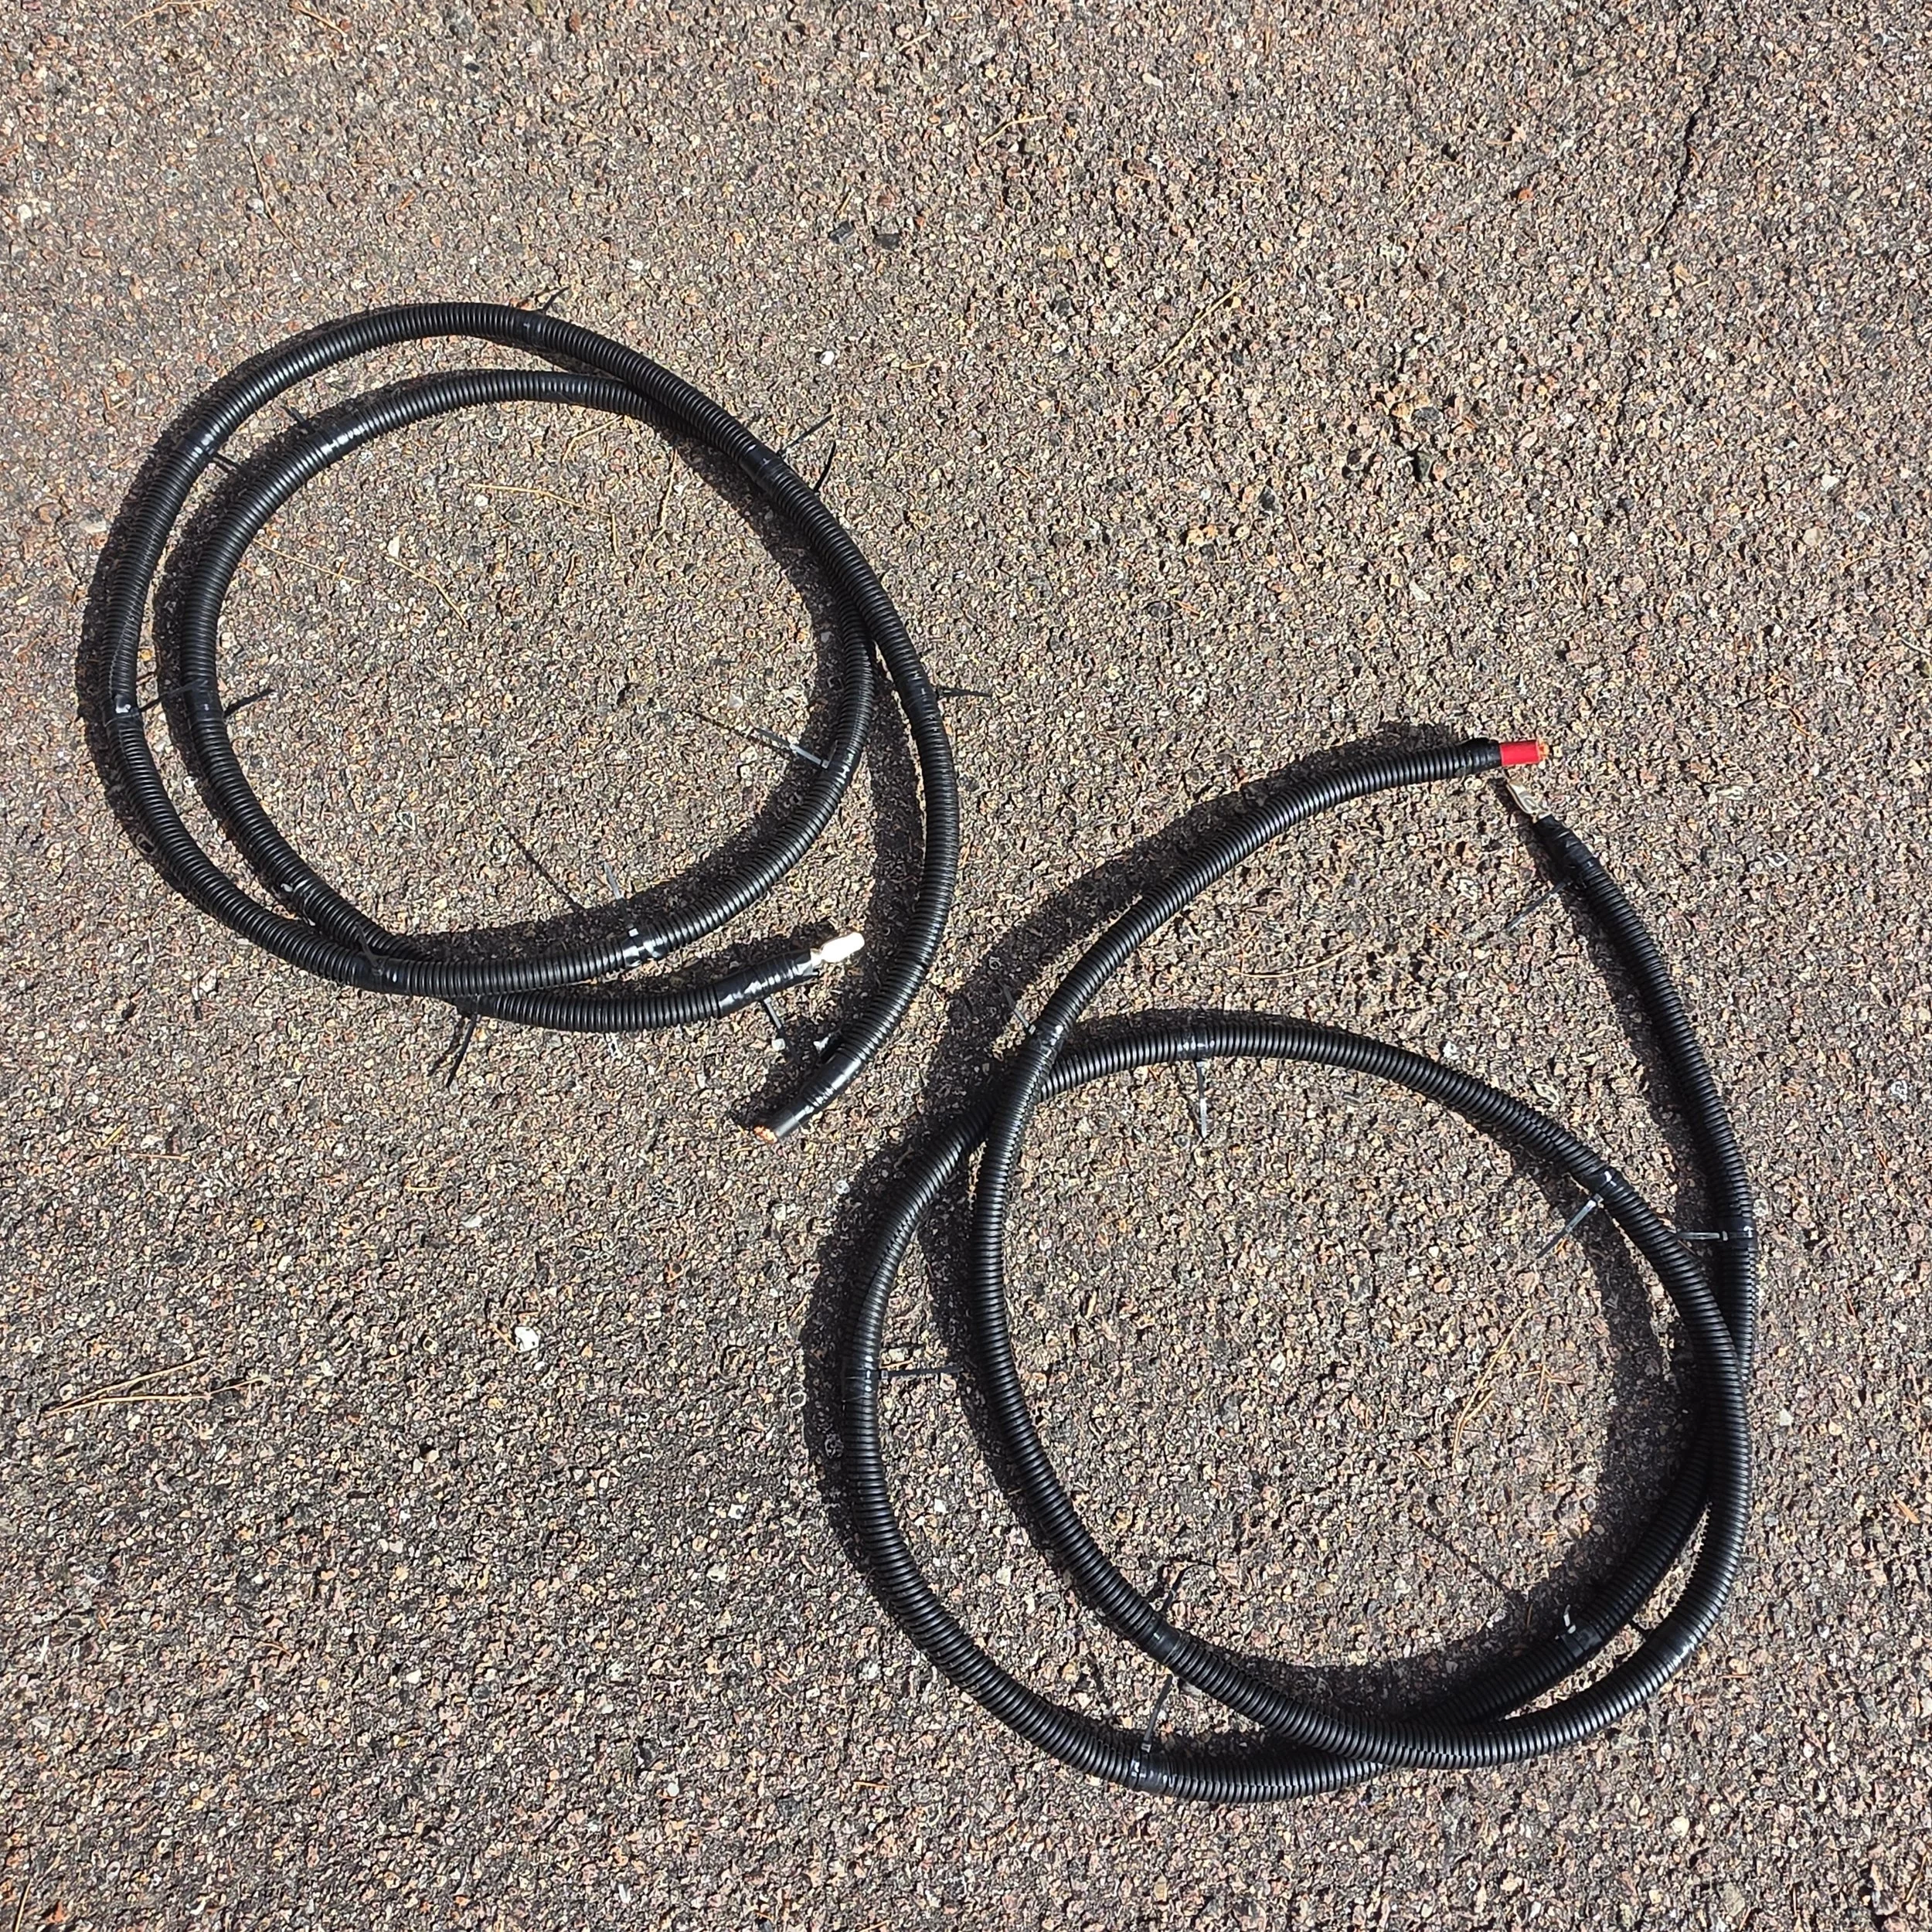
I slid the positive and negative cables into protective sleeving to help guard against abrasion, then connected one end of each cable to the back of the quick-disconnect port.
From there, I routed the cables toward the battery compartment.
This part went considerably more smoothly than the bumper installation.
The positive connection was straightforward.
The negative connection, however, required a new battery clamp.
Which meant cutting off the existing one.
I don't particularly enjoy making irreversible modifications to perfectly functional components. I spent a little time looking everything over, thinking through the installation, and convincing myself that I really did want to cut that cable.
Once the decision was made, there wasn't much left to do but commit.
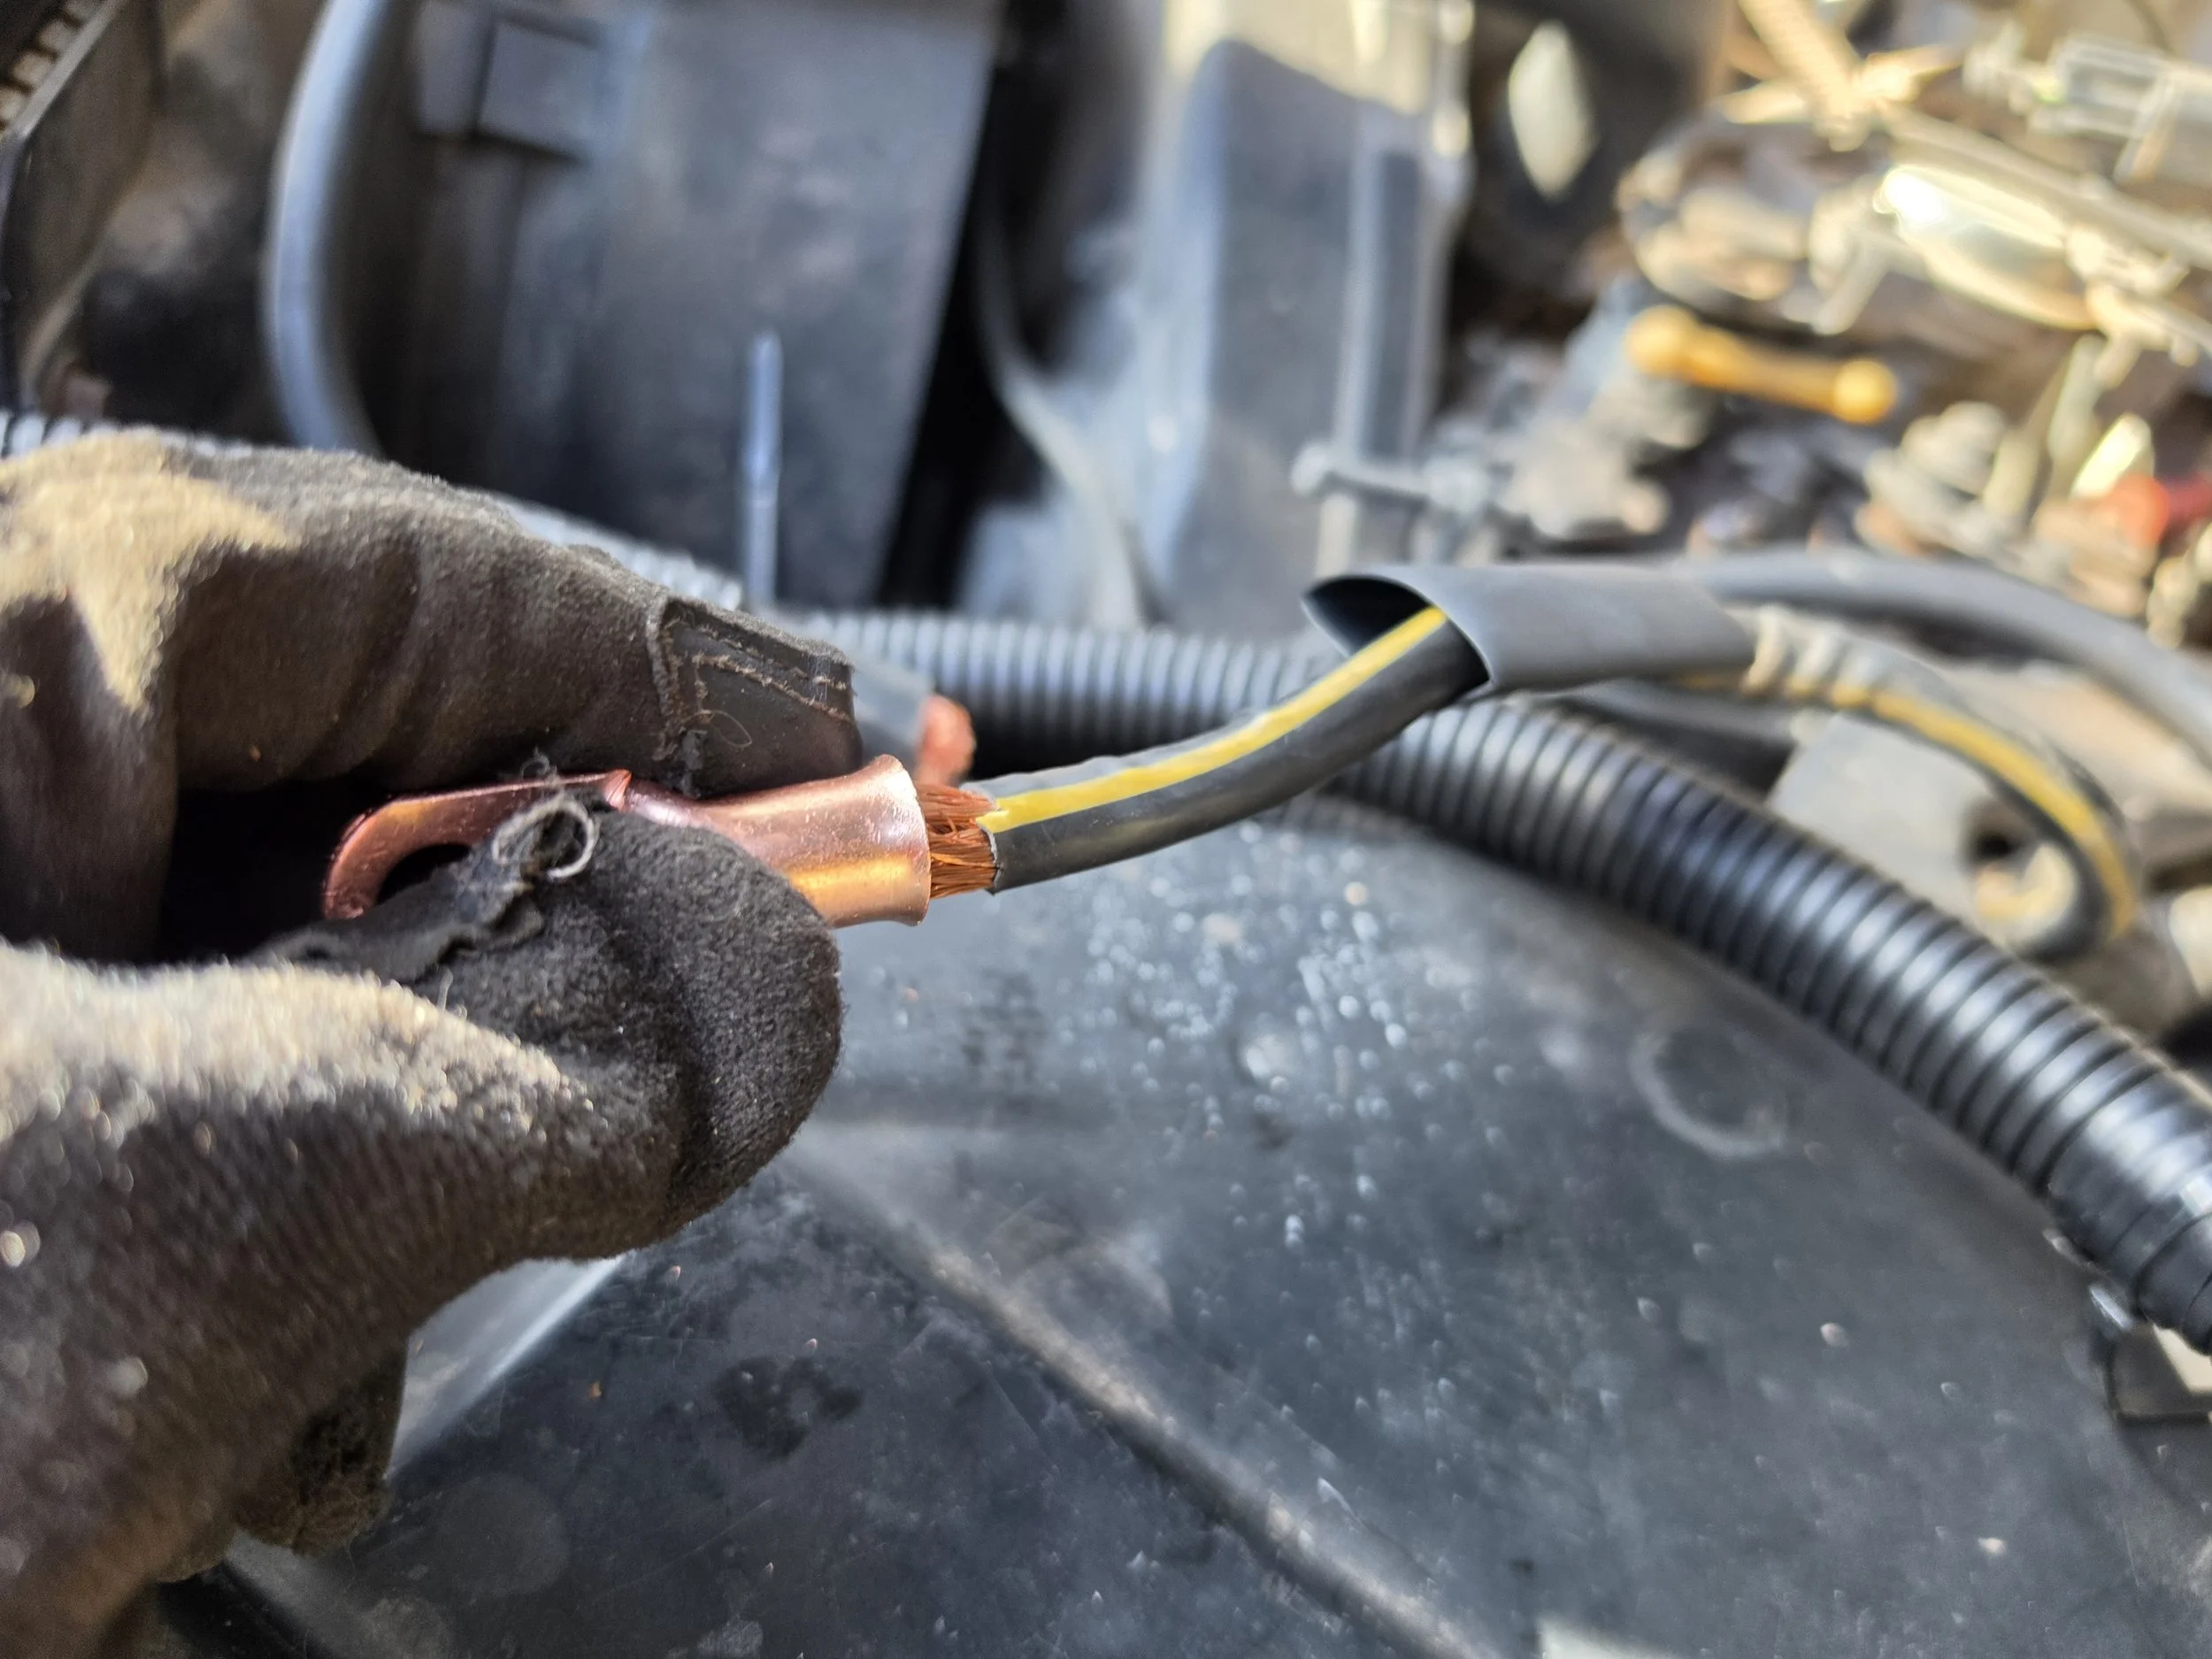
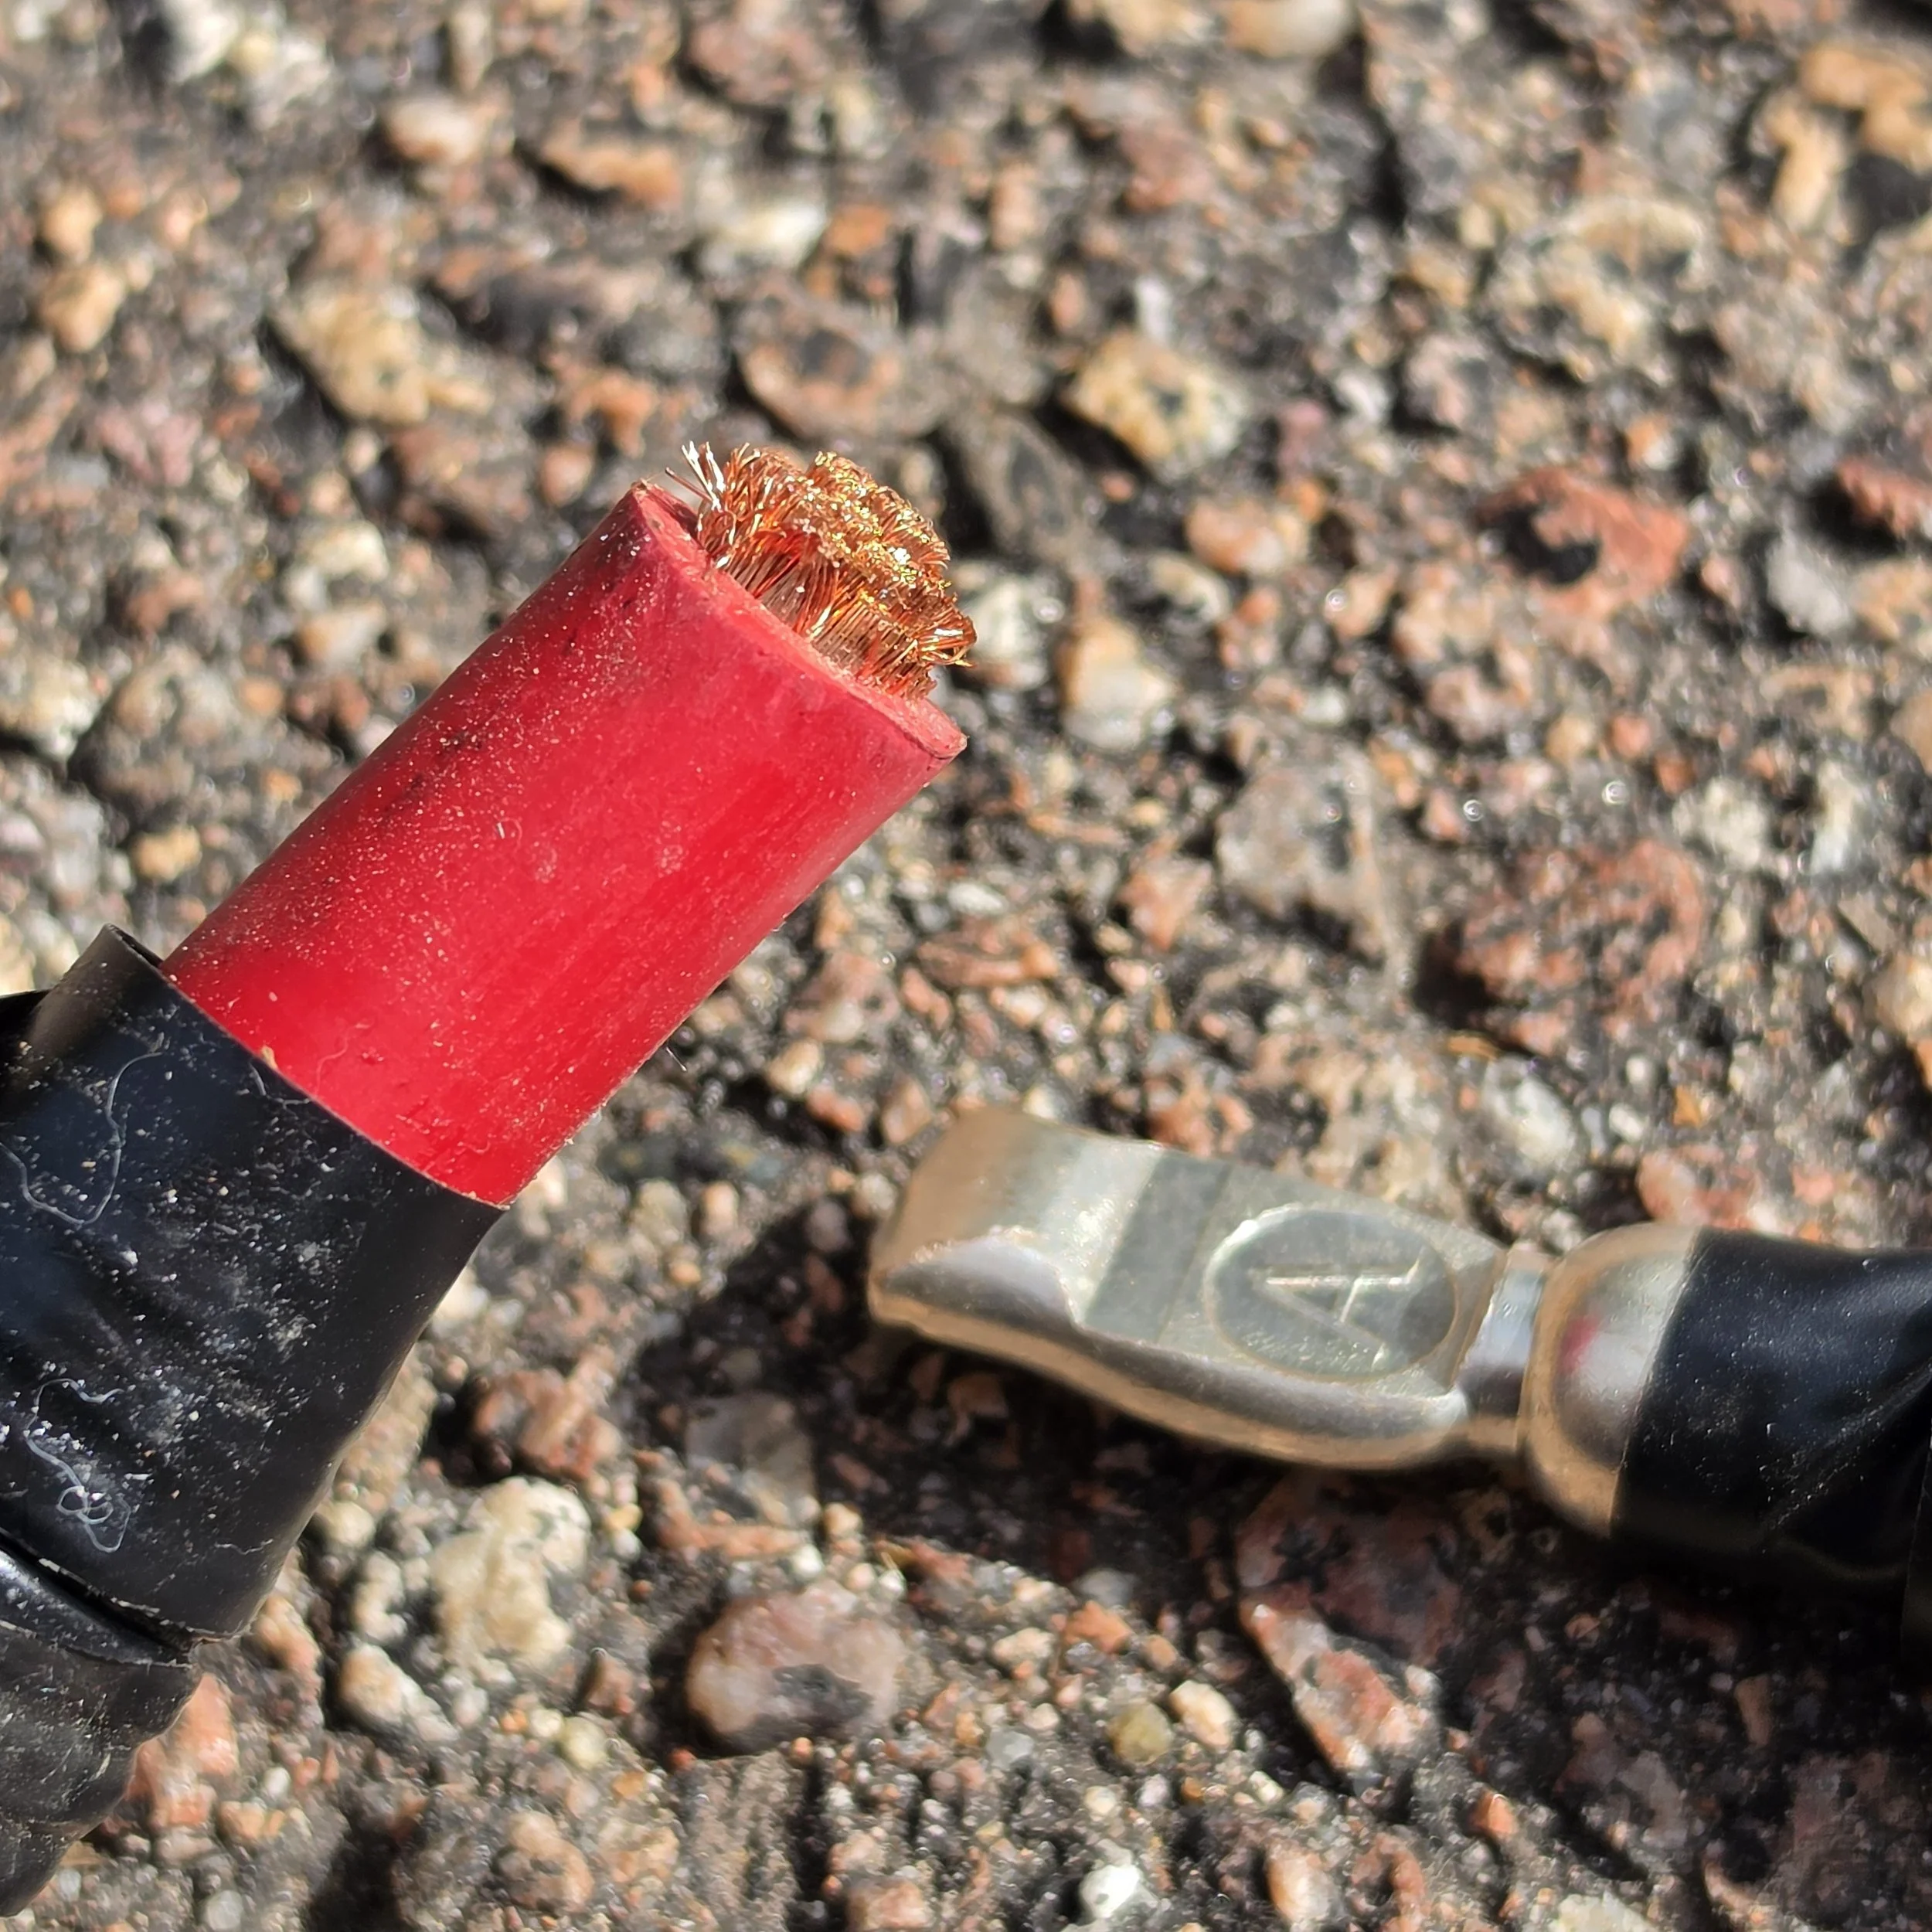
The point of no return! After thinking through the modification a few times, I finally cut the original negative battery cable terminal off. Here, I'm fitting the new copper ring terminal onto the freshly cut cable. No going back now!
Snip.
No going back now. Don’t forget to slide on the heat-shrink material before crimping the terminal ring. ;-)
With the new terminal installed, I finished connecting the cables.
About That Battery...
Before anyone notices the battery in the photographs and starts typing a comment...
Yes.
I know.
It's old.
It's ugly.
It looks like it may have been installed sometime shortly after the invention of electricity.
That battery came with the Delica, and I have absolutely no idea how long it had been in service before I bought the van.
I can't find a readable date on it, either.
But I'm approximately a zillion percent certain it's well past time for a replacement.
Replacing it is on my list, and I intend to take care of that before the cold weather arrives.
In the meantime, at least I've made it considerably easier to jump-start the FBSH if that old battery decides to retire before I replace it.
The Play-Doh Test
With the cables pre-connected, I needed to settle on their final routing.
Remember, the Delica's engine compartment is beneath the front seats. Once everything is installed, the seat and its supporting cover have to lower back into position.
One of my new cables looked suspiciously close to the underside of that cover.
I certainly didn't want to close everything up and discover that the cable was being pinched.
Nor did I want to find out months later that the seat had been slowly rubbing through the cable's insulation.
So, I reached for a highly sophisticated piece of precision measuring equipment.
Play-Doh.
Yep.
I rolled up a blob, placed it on top of the cable where I suspected clearance might be tight, and carefully lowered the cover into place.
Then I opened it again.
The hope was that there would still be a little unsquished Play-Doh remaining.
If it had been flattened completely, I'd know I had a problem.
Fortunately, the test showed approximately 1.5 inches of clearance.
Plenty of room.
Whew!
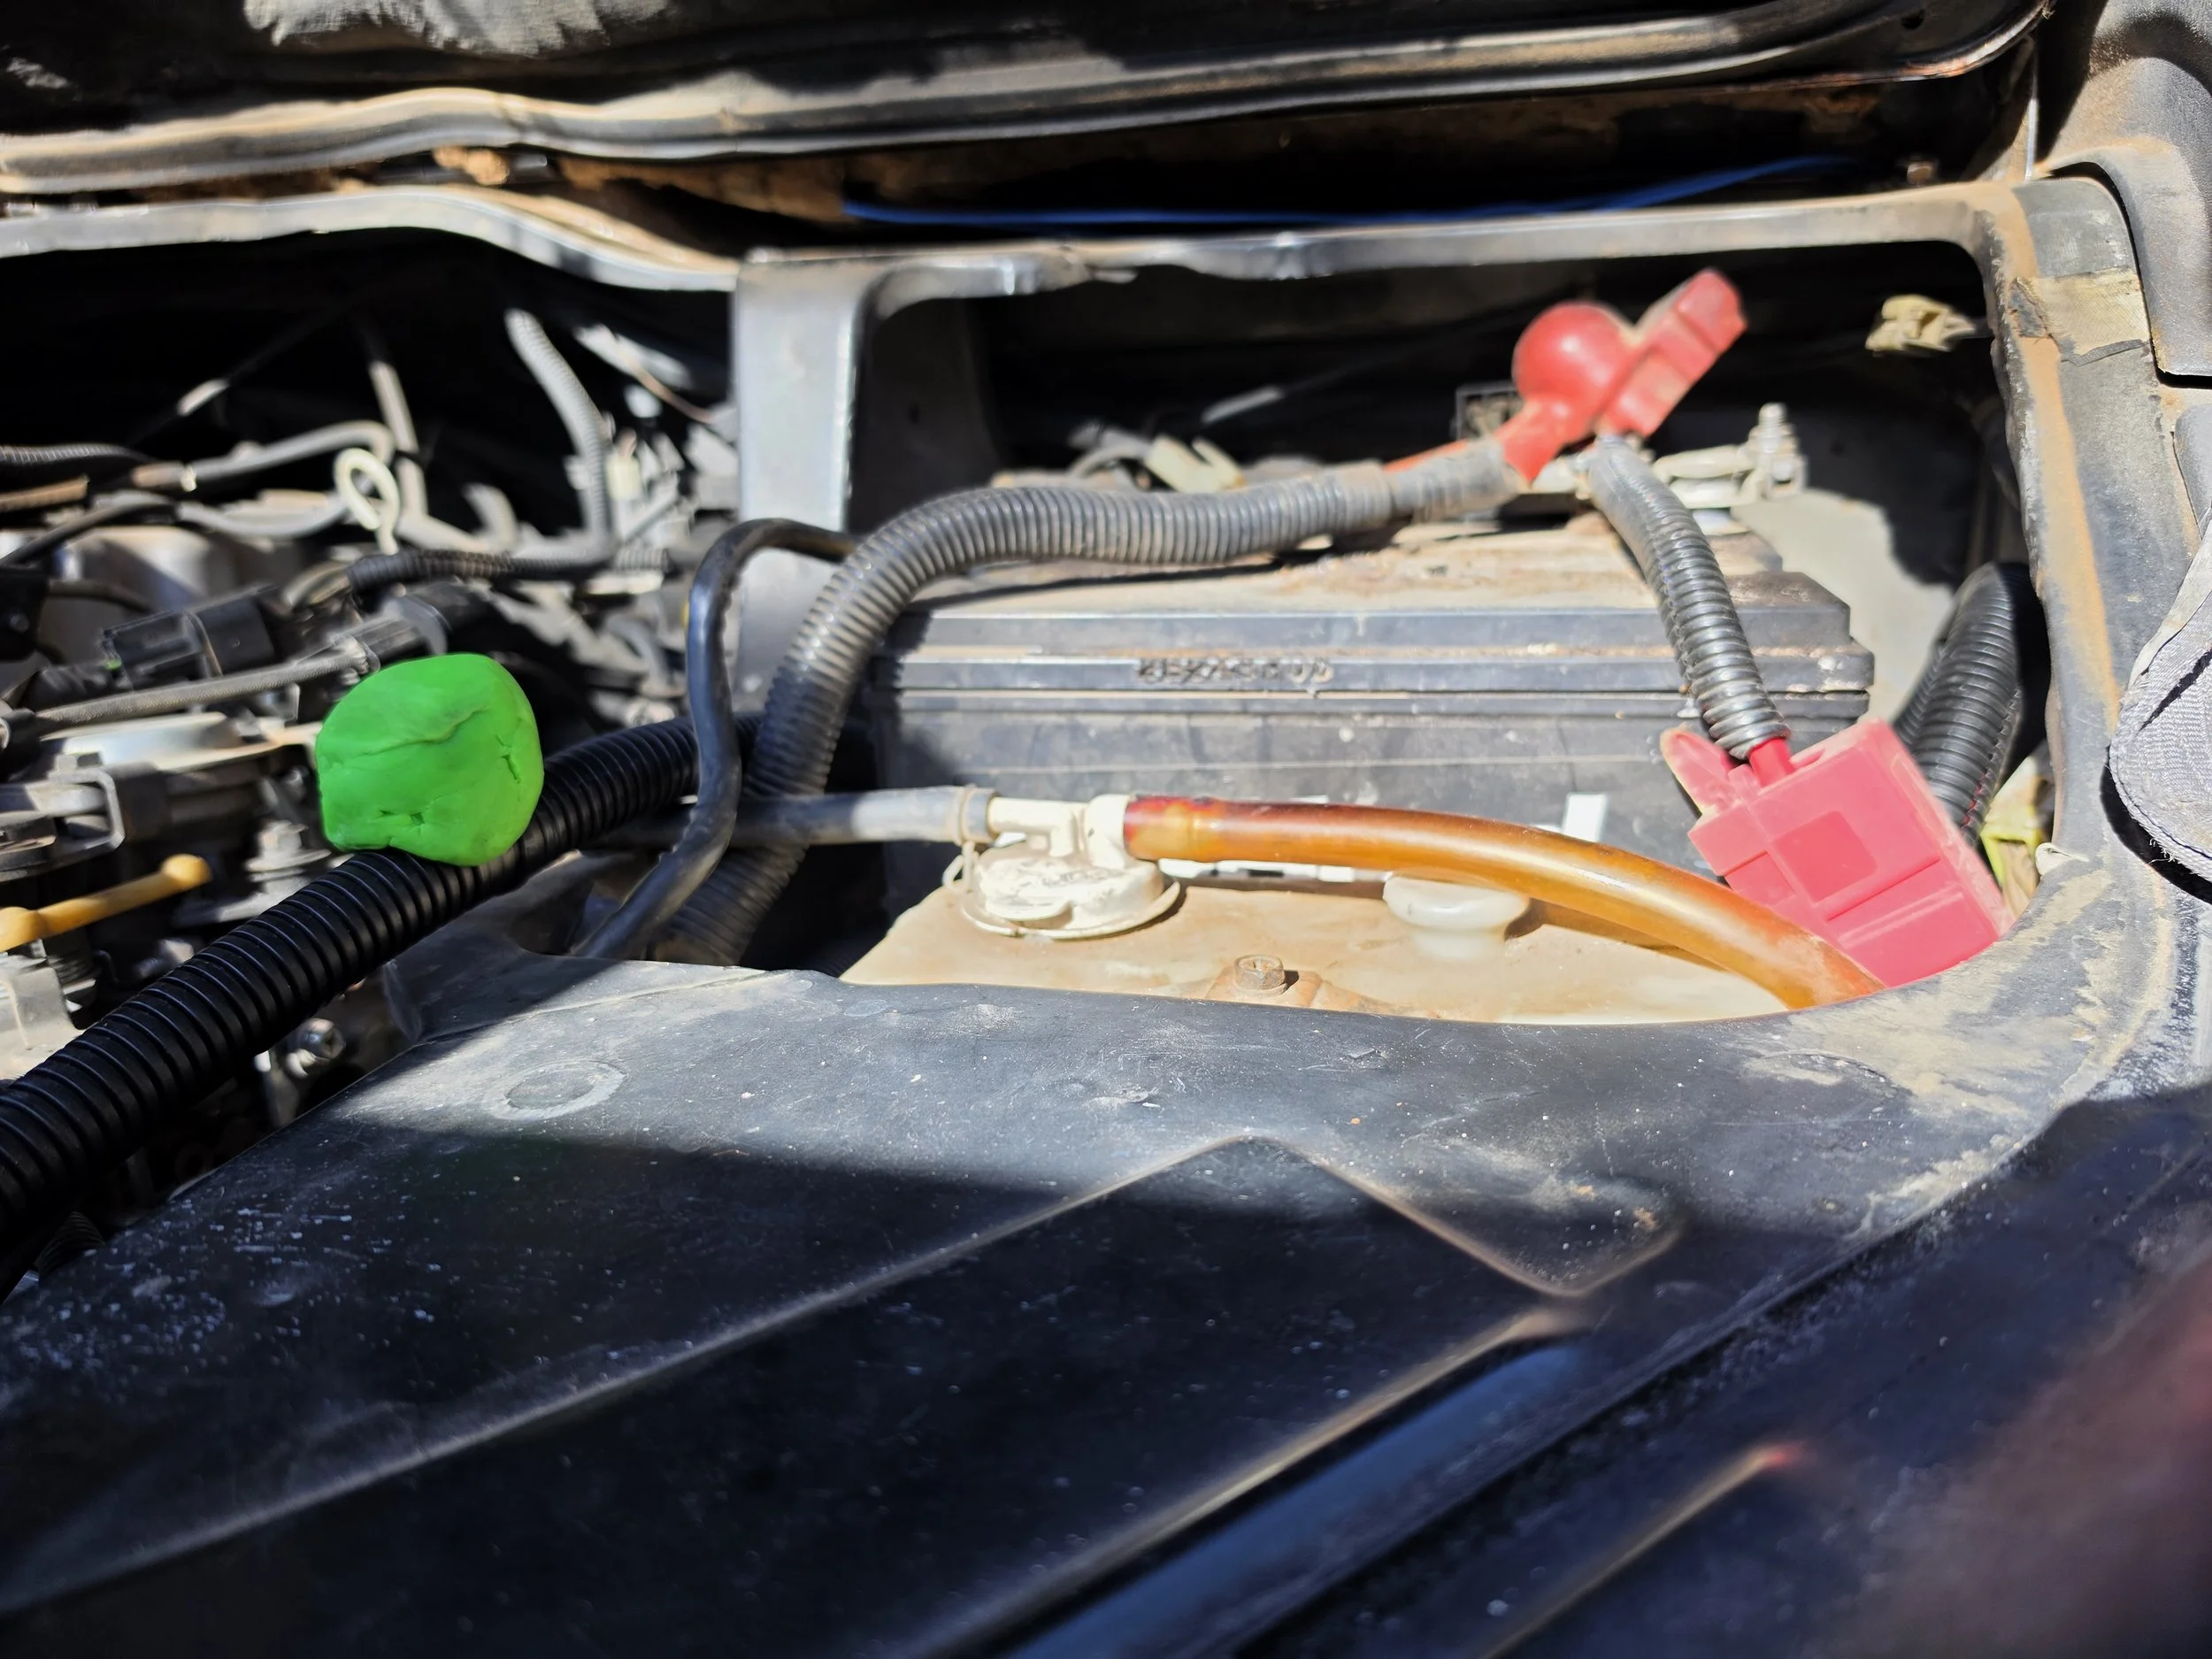
My highly sophisticated clearance-testing equipment: Play-Doh! I placed a blob on the newly routed cable, lowered the passenger seat cover, and opened it again to see how much remained unsquished. The result? Approximately 1.5 inches of clearance. Plenty of room. Whew!
Sometimes the simplest tools are the best tools.
Time for a Test
With the bumper repaired, the port installed, the cables routed, and the battery connections completed, there was only one thing left to do.
Test it.
After all, a conveniently located external power connection isn't particularly useful if it doesn't actually work.
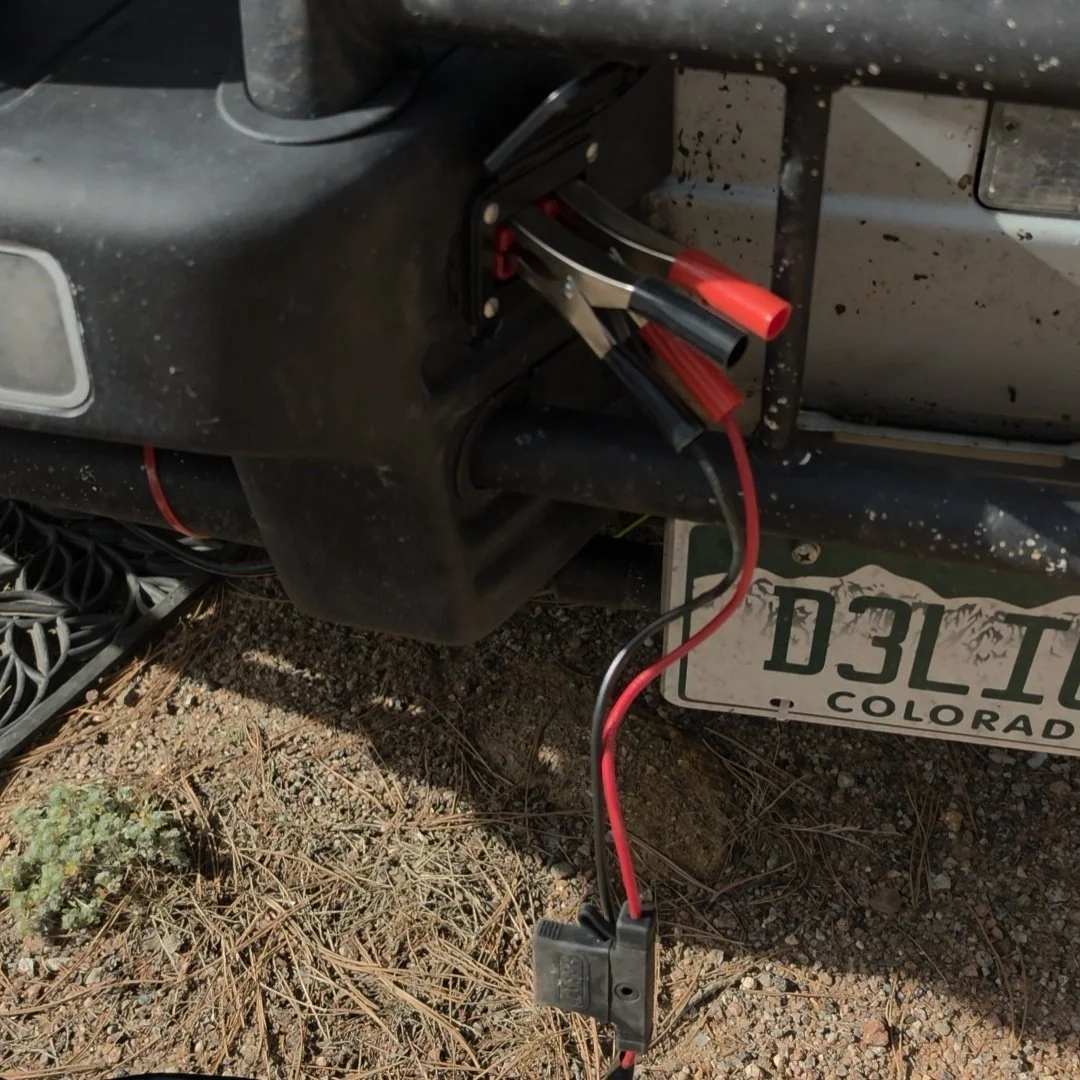
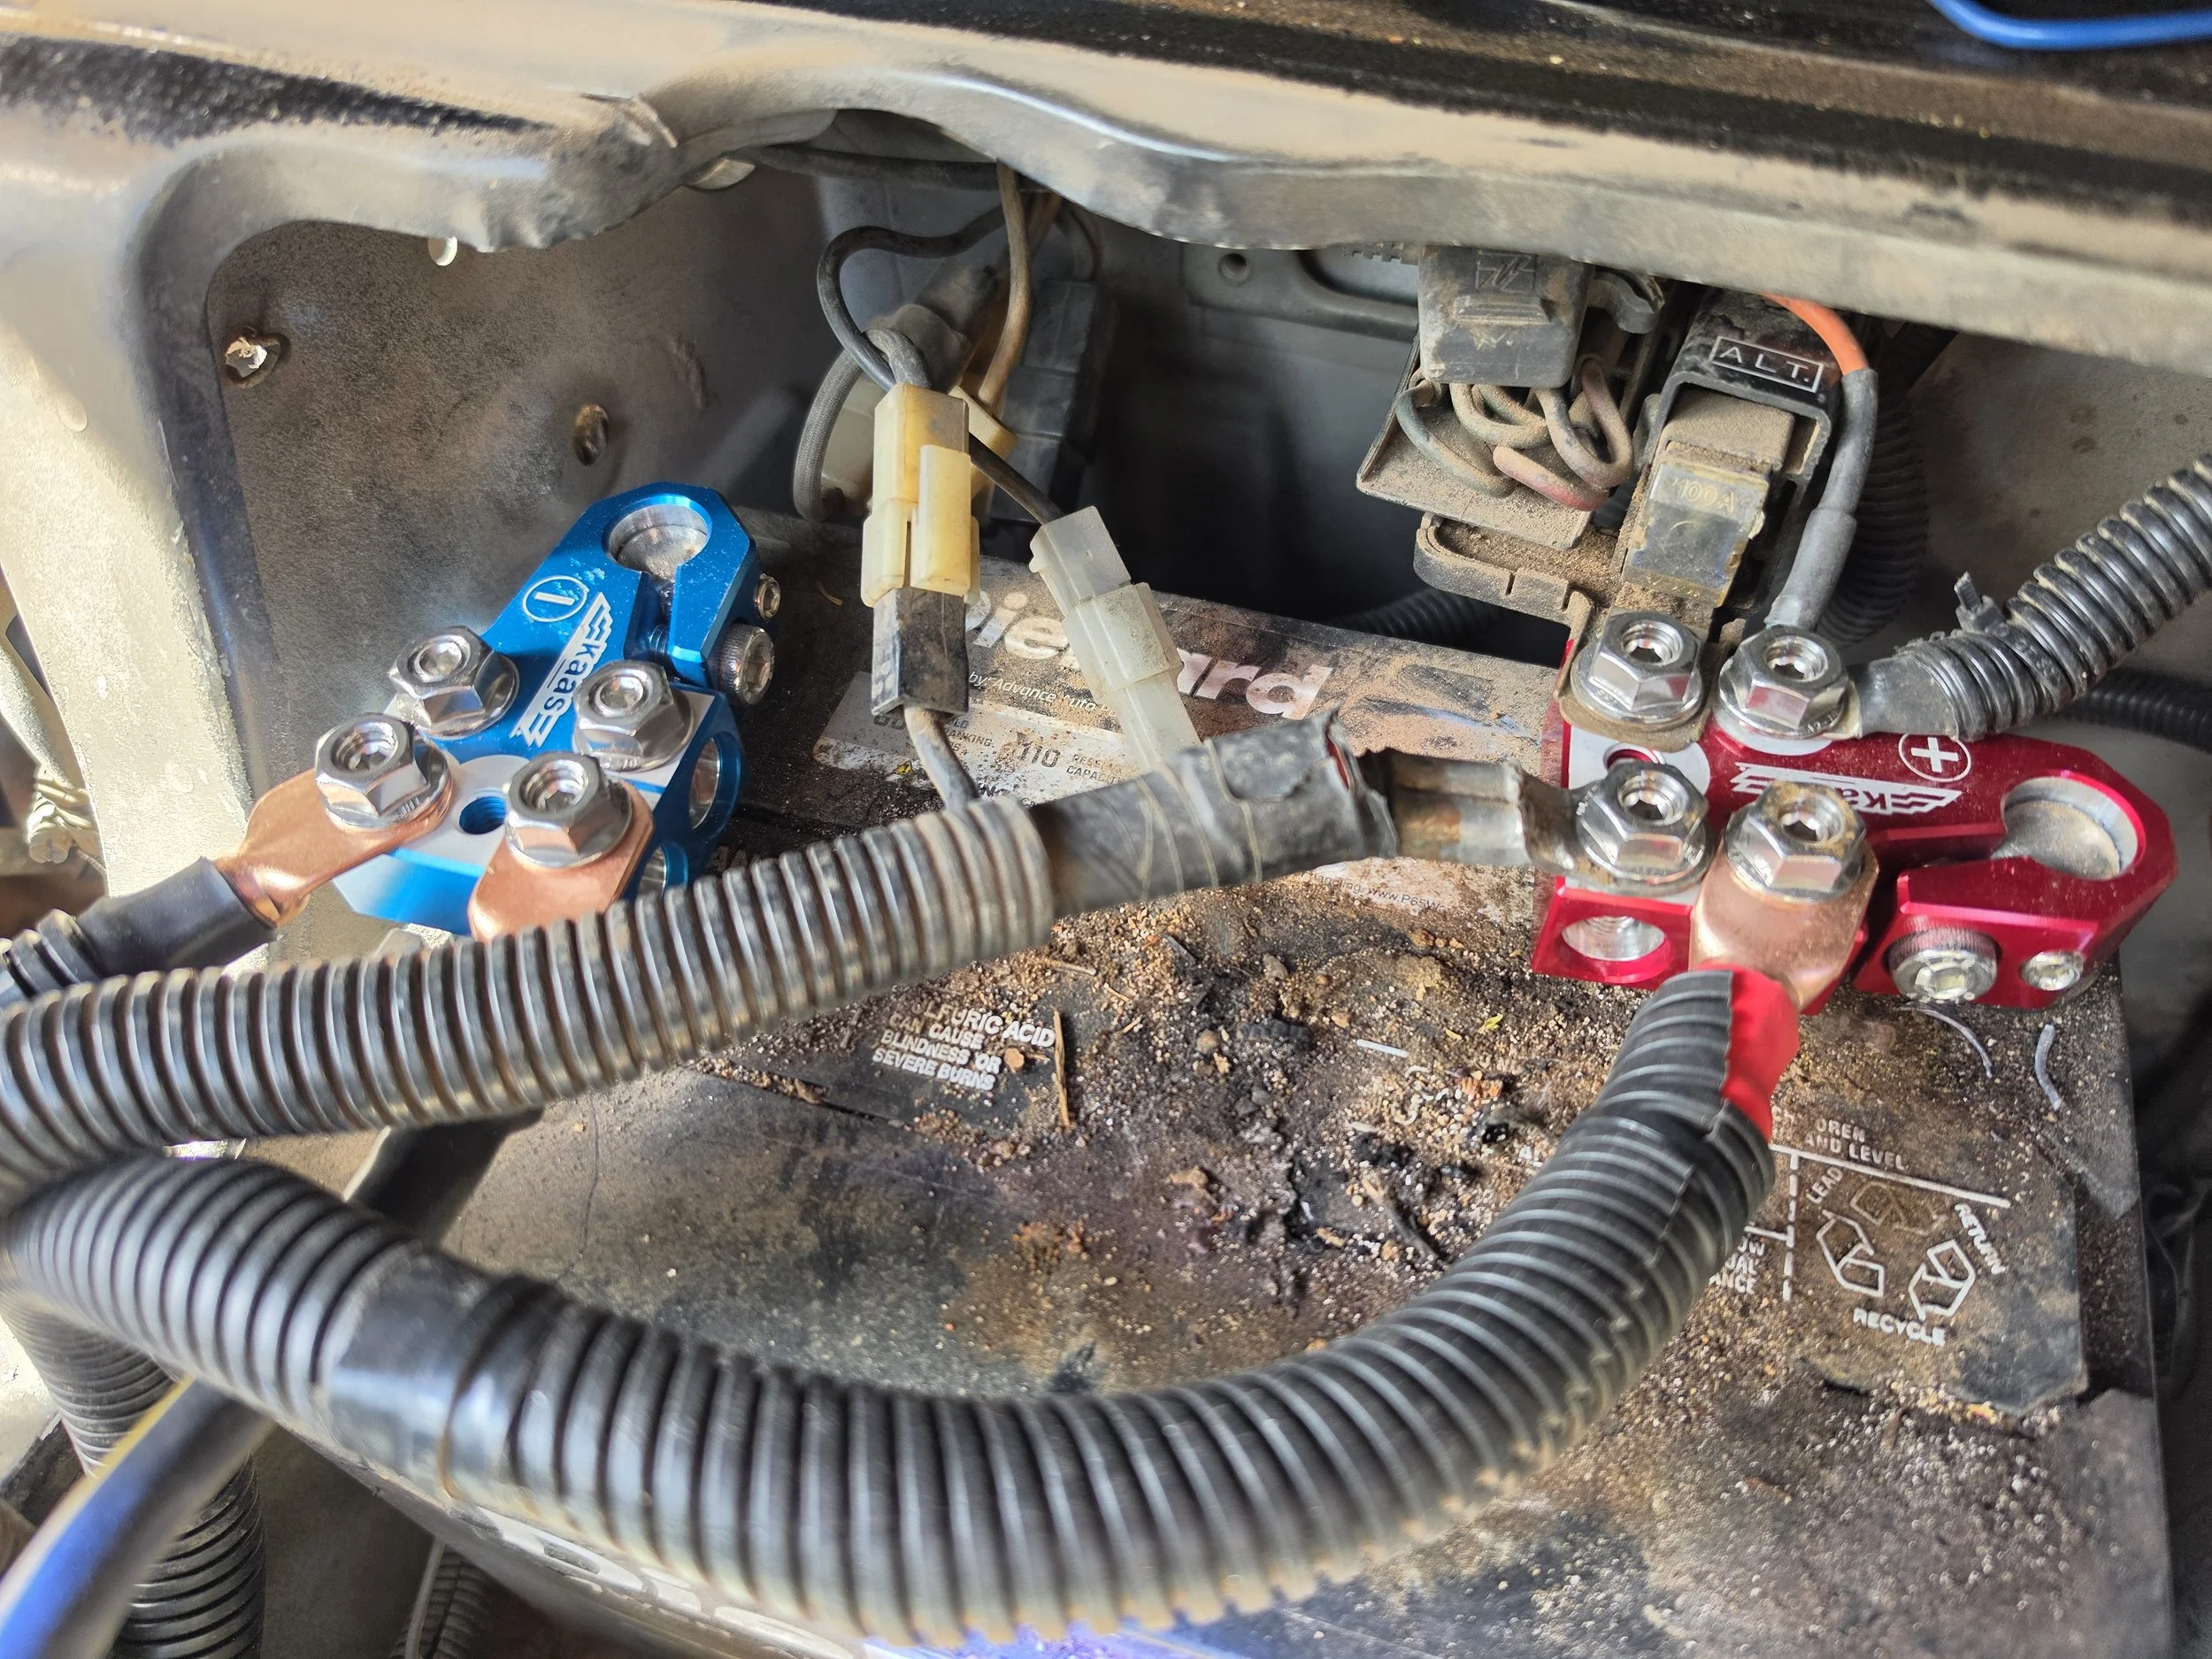
The FBSH now has an accessible connection point for jump-starting without lifting the passenger seat or exposing the engine compartment.
And when I'm out exploring Colorado's backroads, I can use that same connection to power my external air compressor.
No more digging around beneath the seat just to connect the compressor.
No more wrestling with the engine compartment if I need a jump-start.
And, hopefully, no more cutting holes in perfectly good bumper plastic without checking what's behind it.
One can hope.
Next Up: Putting the Port to Work
Of course, installing the port was only half the project.
The next step was getting out my external air compressor and putting the new connection to work.
After spending time on rocky trails with my tires aired down, I wanted a convenient way to bring them back up to road pressure.
And now I had one.
Coming next: Powering My External Air Compressor Through the Delica's New Quick-Disconnect Port.
See You Down the Trail,
Faz 👋