
Xplormor Offroad Accessory Mount
Xplormor recently put out word that they had an accessory panel in the works. This was great as I was just in the process of figuring out where I wanted recovery boards and a Rotopax.
I reached out to them in a bit of a dilemma, I was leaving on a long road trip and wanted an accessory panel for the trip. The guys at Xplormor reached out and said that they could get me a bare panel in time for my trip. There’d be no time to power coat it. How could I refuse? Just before shipping, they asked if a bedliner coating would be acceptable. With that, a couple of days later, and just in time, I received a shipment in the mail.

Accessory Panel Shipment From Xplormor Offroad
I couldn’t open the package fast enough! The Accessory Panel packaging was well thought out and the panel arrived in pristine condition! I now have a couple of these XMO stickers as I own Xplormor’s Triple Hitch (see above image), the Modular Rack, and now an accessory Panel. I think I’ll place a sticker on the Triple Hitch and somewhere on the Rack.


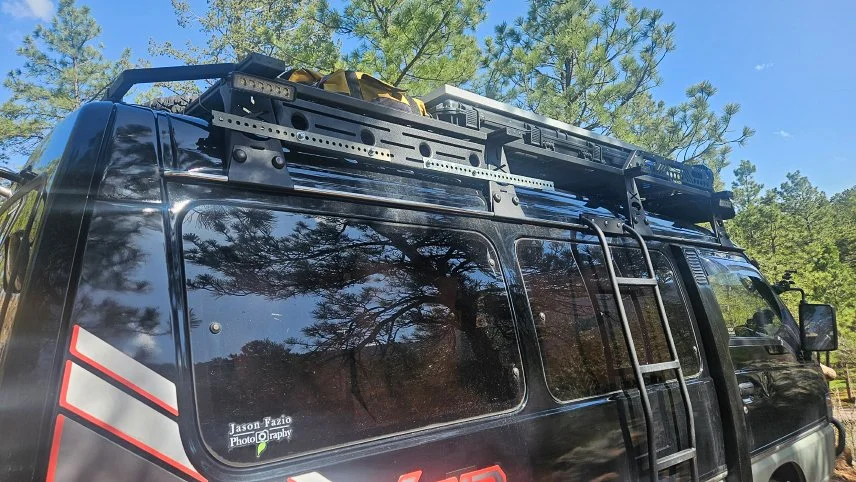
I was concerned that I’d have to make slight adjustments in my Rack’s mounts to accommodate the Accessory Panel. Nope, it went in perfectly. Almost as if it were designed that way. ;-)


I was also concerned that I’d have to remove/replace some of my currently mounted items in order to accommodate the Accessory Panel. I did not. The panel went in without issue.

Triple Hitch, Modular Rack, and Accessory Panel all mounted and ready to go!
With the Accessory Panel fully mounted, it was time to hang my recovery boards. Ideally, I would install two side-by-side Accessory Panels and mount the forward edge of the recovery boards on one and the trailing edge on the other. Well, I didn’t order a second panel. I wanted to feel them out a bit first. Knowing what I know now, I’d have gone ahead and ordered four as, having now seen them, that is my goal.
With a road trip looming, I decided to throw together a quick and temporary solution. I’ll undo this and add additional Accessory Panels later.

Temporary recovery board mounting brackets.
I kept a gap between the two pieces of strapping in order to provide the ability to make lateral adjustments as necessary.
Recovery board mounts (temporary)
After some lateral adjustments and a bit of trimming, the mounts were ready for the boards or so I thought.

Trimmed Temp Mount
The recovery boards sit nice and tight. In their current configuration, the lower edge of the board just barely touched the glass window. Keep in mind, I currently have them mounted on the lower slot on the Accessory Panel. Once I string two Accessory Panels together, I will move the recovery boards up to the top slot. This alone should fix the problem of the boards touching the glass. In the meantime, I created a lower foot that keeps the boards off the glass.

Adjustable Foot
I replaced a bolt on the Modular Roof Rack System (MRRS) with one that I could adjust in and out. Once I got the bolt where I wanted it, I placed a rubber cap on the bolt head. I put an adjustment bolt on the front and the rear mount. The recovery board now rests on the rubber cap instead of against my glass window.

Recovery boards temporarily mounted onto the Xplormor Offroad Accessory Panel.
This will get me through my road trip. When I get back, I will order a couple more Accessory Panels and move the boards to their more permanent home, I’ll update this blog as appropriate.